
Oven Cleaning Mistakes End of Tenancy: 7 Errors to Avoid

Last modified on: 17/08/2026

Oven cleaning mistakes end of tenancy handovers often begin with the wrong method, poor timing or an unchecked appliance manual. The safest approach is to identify the oven, confirm what the inventory expects, allow enough time for dwell, rinsing and drying, and use only products and techniques that the manufacturer permits.
Seven common errors create avoidable rework or damage risk. The practical sequence below shows how to clean, decide when to stop, document the result and choose between DIY work and professional help. It applies to domestic ovens in England, not appliance repair or commercial kitchen compliance.
Key takeaways
- Read the manual first: oven finishes, liners, seals and cleaning programmes have different restrictions.
- Work on a cold appliance: switch it off, protect the surrounding floor and ventilate the room.
- Use controlled chemistry: follow one product label, its contact time and its rinsing instructions.
- Stop before damage: do not flood electrical areas, force components or scrape an unknown coating.
- Leave usable evidence: photograph the cleaned, dry and reassembled oven alongside the wider checkout record.
Table of Contents
Oven cleaning mistakes end of tenancy: check before you scrub
A dark oven cavity can hide whether you are dealing with loose crumbs, baked-on fat, a damaged coating or a removable liner. Open the door in good light, compare the condition with the check-in inventory and identify the make and model. The correct decision depends on the appliance, not on whichever cleaning hack happens to be popular.

Four checks before the first product
ManualCan you identify the model, cleaning programme, liner type and restricted surfaces?
ConditionIs the appliance cool, electrically safe to approach and free from cracked glass or loose parts?
MethodIs the chosen product compatible, labelled for the task and supported by the required ventilation and rinsing?
TimeCan you complete dwell, removal, drying, reassembly and a final check before checkout?
Plan Your End of Tenancy Clean
Enter your postcode to view our rates and availability in your area.

Seven oven-cleaning errors to avoid
1. Leaving the oven until the final hours
Heavy residue rarely disappears in one hurried scrub. Product contact time, repeated wiping, rack cleaning and complete drying all take time. Starting shortly before the inventory clerk arrives encourages stronger dosing, aggressive scraping and incomplete rinsing.
Schedule the oven after food has been removed and before the final floor clean. If you use the appliance again, allow time for another wipe. A wider tenancy checklist helps place the task alongside defrosting, cupboards, extractor areas and final photographs.
2. Running self-clean without checking the manual
Pyrolytic, steam-assisted, catalytic and conventional ovens are not interchangeable. A self-clean cycle may require racks, runners or accessories to be removed. It can create heat, smoke and odour, and it may be unsuitable when the manual, ventilation or appliance condition is uncertain.
Never assume that the presence of a self-clean control makes the programme appropriate at move-out. Follow the manual exactly. If the oven has cracked glass, damaged wiring, a faulty lock, heavy smoke or an unexplained error, stop and arrange qualified appliance advice. Do not test the fault through a cleaning cycle.
3. Putting cleaner on restricted components
Strong oven cleaner is not a universal answer. Heating elements, gas outlets, fan openings, door seals, controls, aluminium parts, catalytic liners and decorative finishes may need a different method or no chemical application at all. Spraying broadly can push liquid into areas that are hard to rinse or dry.
Apply product to the permitted surface in a controlled way and keep the label available. A small compatibility test can reveal colour or finish changes. It does not override the manufacturer instructions. For product handling beyond this task, follow the separate chemical safety guide.
4. Mixing products or copying viral hacks
Do not combine oven cleaner with bleach, acids, ammonia, washing-up products or homemade mixtures. Unknown residues can react with the next product. If you change methods, first remove the previous product as its label directs and let the surface dry.
Dishwasher tablets, foil, razor blades, salt, bicarbonate and citrus are often presented as universal shortcuts. Their suitability depends on the tablet formulation, finish, glass guidance and method. A hack is not safer merely because the ingredients are familiar. Choose an oven-approved, surface-compatible route.
5. Flooding the cavity or dismantling the door
Excess liquid can enter vents, insulation, hinges, controls and electrical areas. Similarly, forcing a door apart to reach between glass panels can damage clips, alignment or seals. Removable racks and trays can be treated separately only when the manual permits removal.
Use controlled moisture inside the cavity and keep tools damp, not dripping. Do not soak a non-removable component. If dirt sits between sealed panes or behind a fixed panel, leave the assembly intact and use an authorised service route. Forced access turns a cleaning task into a repair risk.
6. Scraping hard before the product has worked
Abrasive pads and metal tools can scratch enamel, glass or coated trays. Scrubbing immediately also wastes effort because the permitted product has not had its labelled contact time. Remove loose debris first, apply the chosen product only where allowed, wait as directed, then lift softened residue with a compatible non-scratch tool.
Repeat a gentle cycle if progress is visible. Stop if the finish changes colour, a coating lifts, the glass is chipped or the tool is marking the surface. Old carbonised deposits may need a professional method. No method should be sold as damage-free without seeing the appliance.
7. Skipping rinsing, drying and reassembly
Visible grease is only one part of the result. Cleaner left on a food-heating surface can create odour or smoke when the oven is used. Wet racks can mark, and incorrectly fitted runners can make shelves unstable. Remove residue according to the label, use clean water only where directed, and dry every part completely.
Return racks and trays to their correct positions, wipe the door edges and controls using their permitted methods, and inspect the cavity under a light. If a smell, fault code, damaged seal or unusual noise remains, do not disguise or test the problem. Record it and report it through the appropriate landlord or appliance channel.
A safer end-of-tenancy oven-cleaning sequence
The following sequence is deliberately conservative. The appliance manual and product label take priority where their instructions differ.
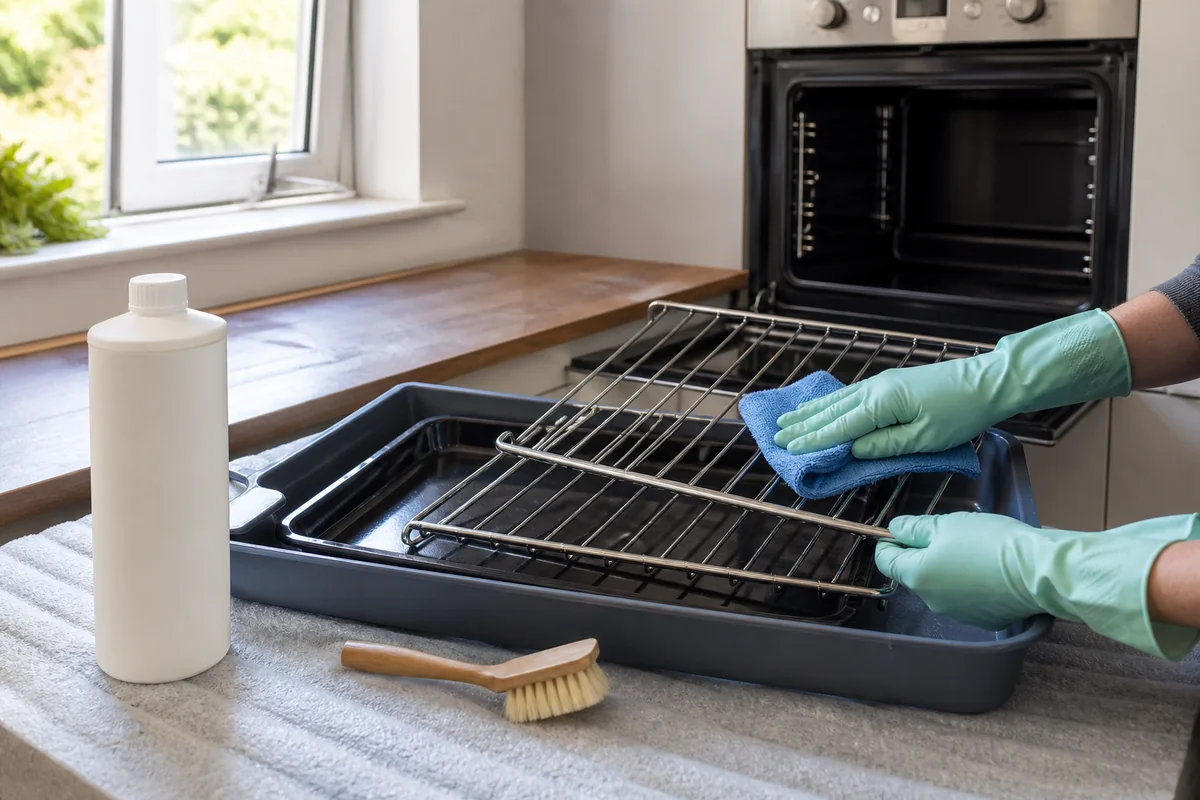
- Confirm the target: compare the check-in record, note existing damage and find the oven manual.
- Make it safe: switch the cool oven off as instructed, ventilate the room, wear label-required protection and cover the floor.
- Separate permitted parts: remove racks, trays and approved runners, keeping their positions clear for reassembly.
- Remove dry debris: lift crumbs and loose carbon without pushing them into fan, burner or element openings.
- Treat by surface: apply one compatible product, avoid restricted areas and allow the full labelled dwell time.
- Lift and repeat: use non-scratch tools, work in sections and repeat gently before considering a stronger method.
- Remove residue: rinse or wipe exactly as the label and manual require, changing cloths or water as they become soiled.
- Dry and rebuild: dry all components, refit them correctly and complete a visual check before taking photographs.
This sequence treats the oven as one part of the property and avoids reducing it to a last-minute stain. It also reduces the cycle in which residue is spread onto the floor, handles or freshly cleaned cupboards. For the consequences of delayed maintenance outside a move, see the separate guide to oven neglect.
DIY or professional oven cleaning?
DIY cleaning can be reasonable when you know the oven type, the residue is manageable and you have time to follow the instructions. Professional help becomes more sensible when the condition, access, chemistry or deadline makes careful household work unrealistic.
| Situation | DIY may be reasonable | Pause or seek help |
|---|---|---|
| Appliance information | Model and manual are available | Unknown liner, programme or disassembly method |
| Condition | Routine grease on intact accessible surfaces | Cracked glass, damaged seal, fault, smoke or loose part |
| Residue | Loose debris and deposits that soften with a compatible product | Heavy carbon, unknown chemical residue or contamination outside domestic scope |
| Time | Enough time for dwell, repeated wiping and drying | Checkout is too close for a controlled process |
| Access | Removable parts follow the manual | Cleaning requires forced panels, sealed glass or electrical access |
You may also enjoy:
Check-out evidence and cleaning charges
In England, a tenancy term cannot simply force a tenant to buy a separate professional cleaning service. Tenants can still be responsible for returning the property to the cleanliness required by the agreement, subject to the starting condition and fair wear. Any proposed deduction should be reasonable and supported by evidence. The current tenant fee guidance explains the prohibited-payment boundary.
Photograph the complete oven in good light after it is dry and reassembled. Include the door glass, cavity, racks and trays. Add close-ups only when the wider photograph still identifies the appliance as a whole. Keep the check-in inventory, messages, invoice if applicable and final check-out report together. A clean-looking oven cannot guarantee a deposit decision, and a receipt cannot settle a disagreement by itself. For dispute-specific evidence and next steps, use the cleaning charges resource.

When Samyx can handle the oven within the move-out clean
Samyx includes oven cleaning as a standard part of its London tenancy cleaning service. The listed scope covers the oven interior and exterior, racks, door glass and removable trays. Tell the booking team about the oven type, condition, access restrictions and any known fault so the work can be assessed honestly.
The service can support a documented room-by-room handover. It cannot control an inventory clerk, landlord, agent or deposit scheme. Samyx’s 72-hour re-clean applies to listed service items identified in the check-out report, within the service terms. It is a re-clean boundary, not a deposit guarantee or an appliance-repair promise.
Book End of Tenancy Cleaning
Enter your postcode to view our rates and availability in your area.
Frequently asked questions
-
Do you have to clean the oven at the end of a tenancy?
You should return the oven to the cleanliness required by the tenancy agreement, taking account of its recorded starting condition and fair wear. Check the inventory, clean by the manufacturer instructions and keep final photographs. A particular deposit result cannot be promised.
-
Can a landlord require professional oven cleaning in England?
A landlord or agent cannot simply require a tenant to buy a separate professional cleaning service as a permitted payment. The property can still be expected to meet the agreed cleanliness standard, and a reasonable evidence-based deduction may be proposed when it does not.
-
Can you use a dishwasher tablet to clean an oven?
Do not treat a dishwasher tablet as a universal oven cleaner. Its formulation and abrasiveness may be unsuitable for some finishes, glass or liners, and residues may be difficult to remove. Use a product and method approved for the specific oven surface.
-
Should you run the self-clean cycle before moving out?
Only if the oven manual permits it, the required parts have been removed and the appliance is in suitable condition. Allow time for heat, ventilation, cooling and final residue removal. Stop if the appliance has a fault, damaged glass or an uncertain locking mechanism.
Important: The information is limited to general domestic cleaning and England tenancies. The appliance manual, finished-product label, tenancy records and current official guidance take priority. Stop if you find damaged glass, a gas or electrical fault, unknown chemical residue, smoke, a loose component or a task requiring sealed-panel access. Use a qualified appliance professional, landlord contact or deposit-scheme process where appropriate.
Author: Svetlana Georgieva (Clara)
Hi, I’m Svetlana Georgieva, but you can call me Clara. As the co-founder and heart behind Samyx Cleaning, I’m devoted to sharing the art of a clean space. Let’s journey into a cleaner, more joyful life together with tips from London's cleaning experts.

Discover more of our cleaning secrets: