
Remove Water Stains from Wood: White Marks, Dark Stains and Safe Limits

Last modified on: 02/08/2026
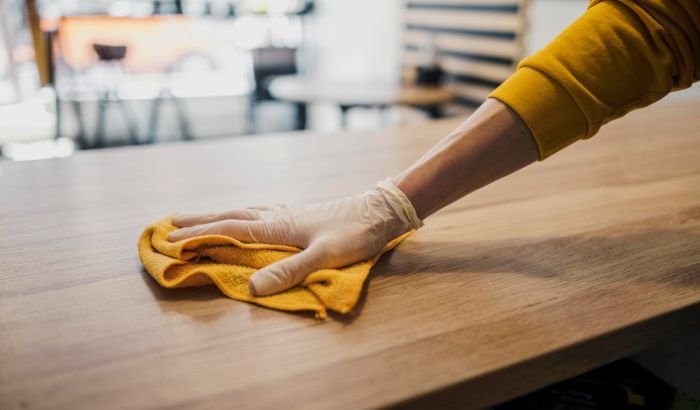
Remove water stains from wood only after identifying the surface, finish and depth of the mark. A cloudy white ring often sits in a coating, whereas a grey, brown or black patch may have passed through the finish or formed around damaged material. Blot fresh moisture, follow the furniture or finish maker’s care instructions, test the least invasive compatible method and stop when the coating changes or the timber needs restoration.
Key takeaways
- White and dark water marks describe different conditions and need separate decisions.
- The visible timber species does not reveal the coating, veneer thickness or previous repair.
- Cleaning should remove surface soil before any judgement about the stain itself.
- Heat, steam, acids, abrasives and household oils can change a finish permanently.
- Dark penetration, swelling, lifting veneer and failed coatings belong to repair or restoration assessment.
Table of Contents
Identify the wood, finish and stain depth first
Start with the item, not the remedy. Look for a care label, order record, maker’s website, finish product or restoration note. Solid wood may be lacquered, varnished, painted, oiled, waxed or left unfinished. Veneer is a thin layer of real wood over a core, so prolonged moisture, heat and sanding can cause damage long before the visible grain disappears. Wood-effect laminate needs its own care route and should not receive a timber treatment.
Inspect the mark in dry, even light. A pale ring, cloudy patch or milky bloom commonly points to moisture or heat affecting a clear coating. A grey, brown or black area may indicate water beneath the finish, a reaction between moisture, metal and tannins, ingrained contamination, biological growth or a failing substrate. Colour alone cannot confirm the cause, so check texture, smell, edges and recent history.
| What you see | Likely level | First decision | Stop signal |
|---|---|---|---|
| Fresh droplets with no colour change | On the surface | Blot, ventilate and dry promptly | Finish becomes soft, sticky or smeared |
| White ring or cloudy haze | Often within wax, lacquer or another coating | Identify the finish and consult its care instructions | Haze spreads, gloss changes or colour transfers |
| Grey, brown or black patch | May sit below a failed finish or in the timber | Clean ordinary surface soil, dry and reassess | Mark remains deep, spreads or follows a joint |
| Raised grain or rough fibres | Water has affected exposed timber | Keep further moisture out and assess restoration | Fibres lift, split or shed during wiping |
| Bubbling or lifting veneer | Bond or core may be affected | Stop wet treatment and protect the area | Edge rises, cracks or sounds hollow |
| Peeling, flaking or crazed coating | Finish failure | Separate cleaning from coating repair | More coating releases on a dry cloth |
Check the whole construction
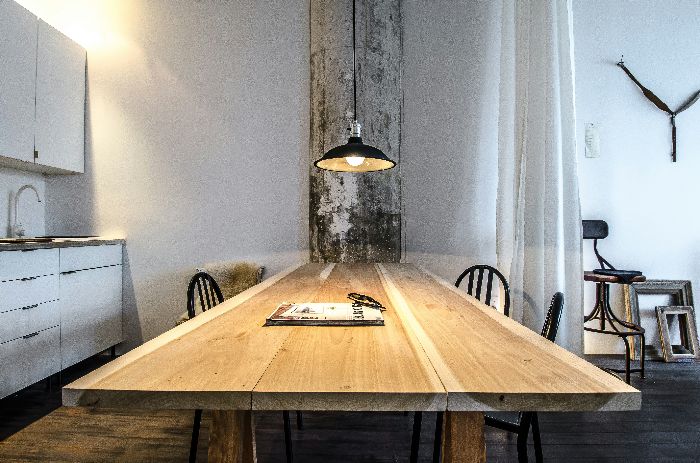
Inspect the underside, edge and a protected area for clues about the surface. A table top may combine veneer, solid lipping, filler, coloured stain and a clear topcoat. Antique, valuable, hand-painted, high-gloss and previously repaired pieces carry a higher cost of experimentation. Ask a furniture maker or restorer to identify them before a visible test changes the sheen or colour.
Find the moisture source before treatment. A single glass ring differs from a patch below a plant pot, a stain around a metal fitting, recurring damp beside a wall or water tracking from a joint. Remove the source, protect the item from more water and allow safe air circulation. A cleaning method cannot solve a leak, condensation path or wet core.
Make the test area answer the right question
A useful test checks the proposed product and action on the same finish, not simply on another piece of wood. Choose a protected part of the item with matching colour, sheen and construction. Dust it first, photograph it in even light and apply the smallest quantity permitted by the instructions. Complete the removal and drying steps before touching the visible ring. A wet test can hide dulling, colour loss and raised grain.
Use a clean white cloth to inspect transfer. Brown or coloured residue may come from soil, old wax, dye or an unstable coating; fine flakes can indicate finish failure; a sticky feel can mean softening. Stop and identify the material when the test changes anything beyond removable dirt. Passing a discreet test reduces uncertainty, though it cannot prove that a damaged or waterlogged section will respond in the same way.
Furniture, floors and worktops need separate boundaries
A dining table can have a factory coating over thin veneer, an antique chest may carry shellac or wax, and a worktop may use a maintained oil system around wet joints and cut-outs. Wood floors add factory finishes, site-applied coatings, expansion gaps and movement between boards. Use the care route for the exact item. Do not transfer a floor-maker’s sanding or spot-treatment advice to furniture, or use a furniture polish on a walking surface.
Water beside a sink, dishwasher, plant pot, external door or bathroom edge also needs a source check. Recurring marks can point to failed sealant, plumbing, condensation or moisture entering an exposed end grain. Dry surface cleaning may reveal the boundary, and repair of the water path controls whether the stain returns. Keep liquid away from electrical fittings, wall sockets and built-in furniture until the source is understood.
Remove water stains from wood with the least invasive route
- Protect the item and surrounding area. Remove the glass, plant pot or wet object. Place the furniture where air can move safely around it. Do not drag a swollen or weakened item.
- Blot fresh moisture. Press a clean white absorbent cloth onto droplets. Lift and change the cloth as it becomes damp. Avoid rubbing a coating that feels warm, tacky or softened.
- Let the surface reach a stable dry state. Use normal room ventilation. Keep steam, direct heater airflow and intense sunlight away unless the maker gives a specific instruction for that item.
- Remove ordinary surface soil. Dust with a clean soft cloth. If the maker permits damp cleaning, use its stated product and minimal moisture, then dry the area at once. Soil or polish film can disguise the stain boundary.
- Test away from the main mark. Choose a discreet area with the same material and finish. Complete the entire application, removal and drying process before comparing colour and sheen.
- Choose the finish-specific route. Use a water-mark product or maker-approved method only when it names the relevant coating. Follow the stated quantity, contact time, removal and aftercare.
- Work on a small section. Keep the product within the tested area and away from joints, exposed edges, metal inlays and damaged coating. Stop after the permitted attempt if the response is uneven.
- Judge the dry result. Compare the treated area in the same light after all moisture and residue have gone. A clean surface can retain permanent discolouration or finish damage.
Fresh water needs removal, not a recipe
Speed matters most before water enters an edge, open joint or damaged coating. Blot from the outside of the wet area towards the centre so the cloth does not spread the liquid. Lift objects resting on the surface and dry their bases. Check below a removable table leaf, mat or coaster because moisture can remain trapped after the visible top feels dry.
Avoid saturating the area with a second liquid to remove the first. Soap, disinfectant and polish are unnecessary when clean water has just spilled onto an intact surface. If the spill contained sugar, milk, alcohol, dye or cleaner, follow the furniture maker’s guidance for that substance; the problem is no longer a simple water mark.
Treat a white ring as a finish problem
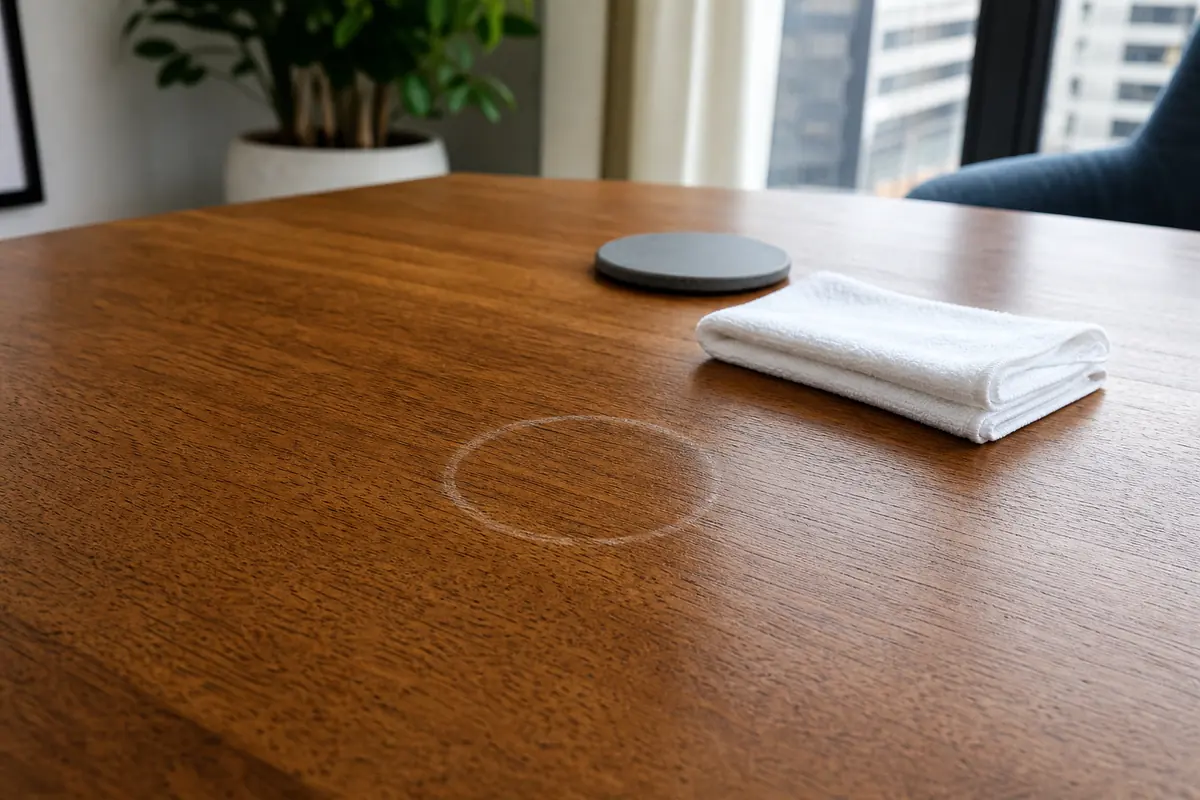
A white stain on a wooden table often appears after a cold glass, hot dish or damp object affects a clear finish. The pale colour may be moisture, microscopic changes in the coating or old wax and polish reacting to heat. The wood underneath may still be sound. Cleaning dirt from the top is useful, though repeated scrubbing will not reliably clear a change inside the finish.
Give the item time to dry under normal room conditions, then use the finish maker’s approved water-mark route. Some makers permit controlled warmth for a specific coating. Apply it only under those instructions, with no steam and frequent inspection. A household iron creates concentrated contact heat and can print fabric texture, soften lacquer, damage veneer adhesive or deepen a heat mark. Generic temperature and timing advice cannot account for those differences.
Stop as soon as the surface feels tacky, gives off an unusual coating odour, changes gloss, transfers colour or develops a larger cloudy patch. Let it cool and stabilise without rubbing. A restorer can assess whether moisture release, coating correction or refinishing is appropriate. That assessment is safer than raising the heat because the first attempt seemed slow.
A dark mark can sit below the cleanable surface
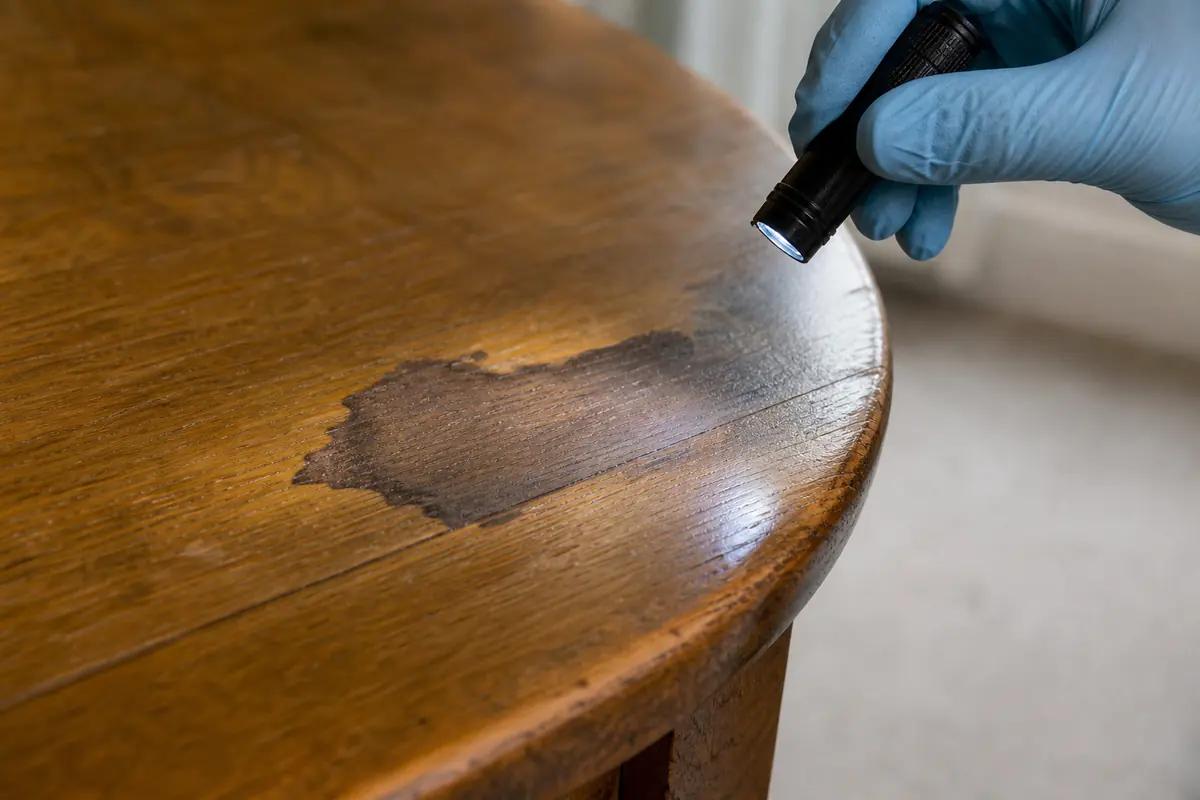
Dark water stains deserve a different decision. Moisture may have passed through a crack, worn finish, open edge or fixing hole. It can darken the timber directly or contribute to an iron-tannin reaction around steel fasteners and metal objects. The same colour can also come from old finish, dye, ingrained dirt or biological activity. Surface appearance does not identify the chemistry.
Clean only the ordinary surface residue permitted by the care instructions, then dry and inspect. If the dark boundary remains below an intact-looking top layer, extra detergent has no direct path to it. If the coating is broken, extra liquid may carry the problem farther into the grain, veneer or core. Mark the edge lightly on a photograph and check whether it expands after the moisture source is removed.
Oxalic acid and other wood bleaches belong to restoration, not routine cleaning. Their use may require stripping the coating, identifying the wood and stain, treating a wider area for even colour, neutralising or rinsing under product instructions, drying, sanding and rebuilding the finish. A small dark spot can become a pale halo or mismatched patch when only the centre is treated. Valuable furniture, veneer and unknown coatings should go directly to a restorer.
Why common household fixes need caution
Search results often list remedies by ingredient, although compatibility depends on the finish and damage level. A product that changes a mark may also abrade, dissolve, swell, bleach, oil or re-gloss the surrounding surface. The visible change is not proof that the coating remains sound. Follow normal chemical safety rules and never combine products to make a stronger treatment.
| Suggested fix | What it may do | Safer decision |
|---|---|---|
| Toothpaste or baking soda | Adds abrasive particles that can dull gloss, expose colour or leave residue in grain | Use only a finish product whose instructions permit the exact surface |
| white vinegar | Acid can affect coatings, filler, colour and metal details | Do not assume a timber surface is acid-resistant |
| Mayonnaise, petroleum jelly or cooking oil | Can leave grease, darken exposed wood, soften some coatings or complicate refinishing | Keep food and unapproved oils off valuable or unknown finishes |
| Hairdryer or clothes iron | Heat can soften lacquer, mark gloss, loosen veneer adhesive or scorch fibres | Use warmth only when the maker permits it and defines the method |
| Steam | Adds heat and moisture to the condition being treated | Keep steam away from water-marked furniture and veneer |
| Bleach or oxalic acid | Changes wood colour and may require coating removal and refinishing | Route penetrated dark stains to a suitable restorer |
Polish can make a dry surface look more even for a short time without removing the cause. Oil can darken both the mark and surrounding wood. Wax can trap residue and alter adhesion during later coating repair. Record every product already used before asking a restorer for help, because the treatment history affects the next safe step.
You may also enjoy:

Know where cleaning ends and restoration begins
Cleaning ends when removable surface soil is gone and the dry mark no longer changes under a compatible mild process. A different colour does not automatically mean more dirt remains. Coating repair begins when the finish is cloudy, worn, dissolved, scratched or lifting. Wood restoration begins when colour or texture has changed within the timber. Structural repair begins when veneer, joints or the core move, swell or separate.
| Dry result | Meaning | Next action |
|---|---|---|
| Surface is sound and residue still transfers | Ordinary soil may remain | Repeat the same maker-approved cleaning route if permitted |
| White haze remains with no surface soil | Finish-level change is likely | Use finish-specific advice or a furniture restorer |
| Dark colour remains below the coating | Penetration or chemical colour change may be present | Stop wet cleaning and assess restoration |
| Coating becomes sticky, dull or patchy | Product or heat has affected the finish | Remove no more material and obtain finish advice |
| Veneer lifts or an edge swells | Bond or core damage may be developing | Keep dry, avoid pressure and use a repair specialist |
| Mark grows or damp returns | Moisture source remains | Investigate the leak, condensation or contact point |
Photograph the whole item, the mark in even light, the edge construction and any label before seeking advice. Include when the water event happened, whether heat was involved, how long the area stayed wet and every treatment attempted. Clear information helps the furniture maker or restorer judge whether a local correction is realistic or a wider finish repair is needed.
Prevent new rings without changing the finish
Use clean, dry coasters under cold drinks and heat-resistant mats approved for the table under hot dishes. Wipe the base of vases, plant pots and decorative objects before returning them. Keep waterproof saucers from sitting directly on valuable wood because condensation can remain unseen beneath them. Check window reveals, outside walls and radiators if marks recur in one position.
Blot spills promptly and lift objects so air reaches both surfaces. Do not leave a damp cloth flat on the furniture. Use the maker’s routine dusting and cleaning method, with separate clean cloths for polish, ordinary soil and accidental spills. Residue from an all-purpose cleaner can create a hazy patch that resembles water damage.
Maintain oil, wax or another finish only on its documented schedule and with a compatible product. Adding unapproved oil whenever the timber looks dry can produce uneven colour and sticky soil retention. Routine wood-furniture care is a separate task from correcting a water mark, so keep a record of the finish and approved maintenance product for the next clean.
Recheck high-risk contact points during normal use. Coaster cork can stay damp, felt pads can hold a spill against the coating, and plant saucers can overflow without leaving water on the visible side. Replace damaged barriers, leave airflow around frequently moved objects and inspect exposed edges before the finish opens. Early source control is less invasive than repeated spot treatment.
Where Samyx can help after the wood is assessed
Samyx can include ordinary compatible furniture-surface cleaning during a broader one-off cleaning visit after the material, finish and condition are checked. The service does not promise removal of permanent water marks and does not replace finish correction, wood bleaching, sanding, refinishing, veneer repair, structural work or leak investigation. A furniture restorer is the appropriate route when the dry mark sits below the cleanable surface.
Book One-Off Cleaning
Enter your postcode to view our rates and availability in your area.

Conclusion: Let the finish and damage level control the method
The safest route starts with blotting, material identification, ordinary surface cleaning and a dry comparison. White haze can be a coating issue; dark colour can signal penetration; swelling and lifting point to repair. Use only a method approved for the confirmed finish and stop before a cleaning attempt becomes an uncontrolled restoration job.
Frequently asked questions
-
Can water stains be removed from wood?
Some can. Fresh surface moisture may leave no mark after prompt blotting and drying, and a white finish-level ring may respond to a method approved for that coating. Dark penetration, failed finish, swelling or lifting veneer normally needs restoration or repair assessment.
-
What does a white ring on a wooden table mean?
A cloudy white ring often indicates moisture or heat affecting wax, lacquer, varnish or another clear coating. It does not identify the finish or prove that the timber underneath is damaged, so check the maker’s care information before treatment.
-
Can you use an iron to remove a water mark from wood?
Do not treat a household iron as a universal method. Contact heat can soften a coating, print fabric texture, loosen veneer adhesive or deepen a heat mark. Use controlled warmth only when the furniture or finish maker permits it and stop at any texture, colour, gloss or odour change.
-
How do you remove a dark water stain from wood?
First remove permitted surface soil and judge the fully dry mark. A stain beneath the finish may require coating removal, specialist bleaching, colour matching and refinishing. Those are restoration processes, so stop wet cleaning and use a suitable furniture restorer for veneer, valuable items or unknown finishes.
Important: Wood, veneer, laminate, paint, lacquer, varnish, oil, wax and restoration coatings respond differently to moisture, heat, abrasion and chemicals. Follow the furniture and finish makers’ instructions, use only compatible labelled products and test where permitted. Never mix cleaners. Stop for tackiness, colour transfer, new haze, gloss change, coating lift, swelling, cracks, soft material, recurring damp or a spreading dark mark, and use the appropriate furniture, finish, leak or repair specialist.
Author: Svetlana Georgieva (Clara)
Hi, I’m Svetlana Georgieva, but you can call me Clara. As the co-founder and heart behind Samyx Cleaning, I’m devoted to sharing the art of a clean space. Let’s journey into a cleaner, more joyful life together with tips from London's cleaning experts.

Discover more of our cleaning secrets: