
What Happens If You Don’t Clean Kitchen Appliances?

Last modified on: 27/08/2026
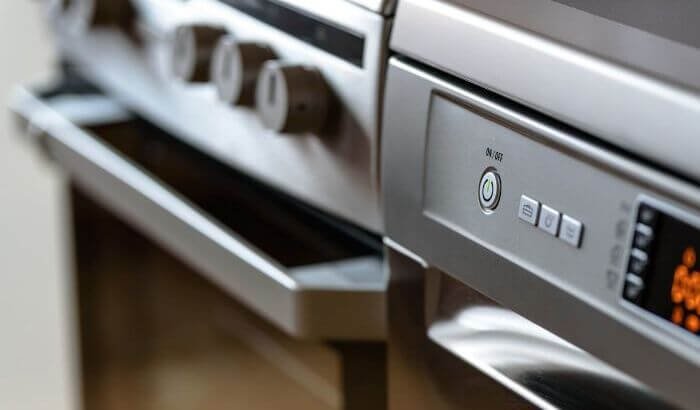
What happens if you don’t clean kitchen appliances? The first signs are usually visible residue, stale odour, sticky controls or restricted airflow. Smoke, leaks, sparking and repeated faults require more than another cleaning attempt.
Each appliance collects a different combination of food, grease, detergent film, limescale, dust or moisture. Check what you can actually observe, follow the appliance manual and separate routine cleaning from maintenance or repair. This prevents a minor spill from being ignored and a technical fault from being mistaken for dirt.
Let the symptom choose the next step
- Stop using the appliance if there is persistent smoke, sparking, a damaged cable, gas odour, leaking water, repeated tripping or an unfamiliar error.
- Switch off, unplug or isolate the appliance only as its manufacturer directs, then let heated parts cool fully.
- Identify whether the visible problem is food residue, grease, detergent film, limescale, dust, moisture or a blocked accessible filter.
- Remove only the parts approved for user cleaning and use a product compatible with every surface it will touch.
- Rinse and dry as directed, refit each part correctly and check the appliance before normal use.
- Choose repair or specialist advice when cleaning does not remove the warning sign or the problem involves a hidden system.
Key Takeaways
- Clean spills and loose residue before they spread or harden.
- Use the manual to identify removable, washable and excluded parts.
- Base cleaning frequency on use, residue and manufacturer intervals.
- Keep water and cleaning products away from electrical openings.
- Escalate persistent smoke, leaks, faults or damaged components.
Table of Contents
What happens if you don’t clean kitchen appliances by type?
The consequences depend on where residue collects and how the appliance works. The table gives a first diagnosis. It does not replace the model-specific care instructions.
| Appliance | What may build up | What you may notice | Boundary |
|---|---|---|---|
| Fridge or freezer | Food spills, crumbs, sticky residue and odour sources | Smell, stained shelves, dirty seals or residue beneath drawers | Temperature changes, damaged seals, leaks or repeated icing need diagnosis |
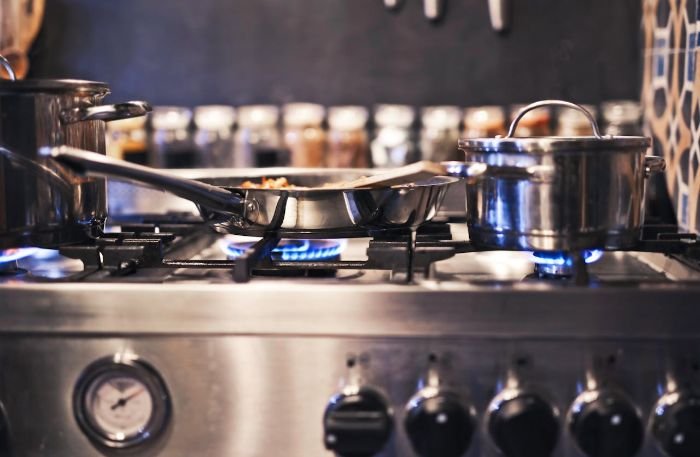
| Oven or hob | Grease, burnt food and sugary spills | Smoke during use, burnt odour or baked-on deposits | Gas odour, sparking, damaged elements or persistent smoke are not cleaning jobs |
| Toaster or air fryer | Crumbs, oil droplets and food debris | Burnt smell, visible crumbs or sticky removable parts | Never immerse the electrical body or reach into live heating areas |
| Dishwasher | Food debris, grease, detergent film and limescale | Odour, visible filter soil, cloudy residue or restricted spray | Standing water, error codes, leaks or drainage faults may need repair |
| Microwave | Food splashes, grease film and condensation residue | Odour, dried splatter or a dirty turntable and seal area | Arcing, damaged door parts or repeated electrical faults require service |
| Kettle or coffee machine | Limescale, coffee oils and removable-part residue | Scale, stale taste or slower visible flow | Use only the maker’s descaling and cleaning route; hidden lines stay closed |
| Extractor | Grease and dust on covers or approved filters | Sticky surfaces, visible filter loading or reduced apparent airflow | Unusual noise, damaged wiring or inaccessible ductwork needs the right trade |
Clean, maintain or repair?
| Evidence | Best next step | Do not assume |
|---|---|---|
| Fresh spill, crumbs or accessible surface grease | Cool or isolate as directed, then complete routine cleaning | That stronger chemistry will work faster |
| Dirty user-removable filter or part | Follow the manual for removal, washing, drying and refitting | That every filter is washable or interchangeable |
| Scale, detergent film or repeated odour | Identify the source and use the approved maintenance product or cycle | That vinegar, lemon or bicarbonate suits the model |
| Persistent smoke, sparking, gas odour or damaged cable | Stop use and arrange qualified advice | That residue is the only cause |
| Leak, standing water, error code or repeated tripping | Isolate safely and use the manufacturer or repair route | That another cleaning cycle will correct a fault |
| Droppings, nesting or repeated pest activity | Stop using contaminated equipment and seek suitable pest advice | That surface wiping solves the source |
Take a photograph before cleaning an unusual mark or leak. It can help you compare whether the symptom returns and gives a repair technician useful context. Do not power the appliance merely to reproduce smoke, sparking or a gas smell.
Prepare the appliance without hiding the evidence
- Read the care section for the exact model and identify the approved isolation method, removable parts and excluded products.
- Remove food, dishes or loose accessories and protect the nearby floor or worktop from debris and drips.
- Collect loose crumbs or dry residue before using liquid. Keep a separate cloth for the dirtiest or raw-food area.
- Patch-test the compatible cleaner on a concealed part of the same finish when the instructions recommend it.
- Work from cleaner surfaces towards heavier residue, changing cloth faces before soil is transferred back.
- Keep removed screws, clips and panels untouched unless the manual explicitly treats them as user-serviceable parts.
Do not erase evidence of a fault before seeking help. Photograph water beneath a machine, record an error code and note when an unusual noise occurs. Clean only the accessible spill if it is safe to do so. A technician may need to see the original pattern.
Fridges and freezers: residue, odour and temperature are separate problems
Old food, unnoticed spills and dirty containers can create persistent odour and sticky residue. A leaking pack may spread raw-food liquid across a shelf or drawer, so remove affected food, contain the spill and clean the accessible surface using the fridge maker’s instructions. Keep food out of the temperature danger created by an unnecessarily long clean.
Remove shelves and drawers only when the manual permits it. Cold glass or plastic may be vulnerable to sudden temperature change, and force can damage clips or runners. Wash, rinse and dry removable parts as directed before refitting them. Use the fridge odour guide to find a concealed source before relying on an absorber.
Work shelf by shelf so chilled food can be returned promptly. Check the underside of drawers, bottle racks, seal folds and the floor beneath the appliance where safe access is possible. Do not pull a heavy fridge forward without a safe method, and do not block or wet ventilation openings. Dispose of food according to its condition and storage history; cleaning the container does not make questionable food suitable to eat.
A fridge that is not holding the expected temperature, repeatedly icing, leaking or running with an unusual sound needs a separate check. Cleaning visible seals or vents may be part of user maintenance. It does not confirm that the refrigerant, thermostat, drainage or electrical system is sound.
Ovens, hobs, toasters and air fryers: heated residue needs caution
Grease and food deposits can harden each time the appliance heats. You may notice burnt odour, smoke, discolouration or crumbs collecting in an approved tray. Let the appliance cool, isolate it as directed and remove only the racks, trays, crumb collectors or baskets listed as user-cleanable.
Match the product to the appliance and the exact finish. Strong oven cleaner may be excluded from aluminium, catalytic liners, heating elements, seals, printed controls or self-cleaning surfaces. Abrasive tools can scratch glass or coatings. Apply products to the cloth when direct spraying could send liquid into vents or controls.
Smoke that continues after accessible residue has been removed, sparking, a damaged element, gas odour or a faulty control needs qualified attention. Do not run a self-cleaning cycle merely as a test, and never put water into a toaster or other exposed electrical cavity.
For a crumb tray or air-fryer basket, empty loose debris first and wash only the removable item using the stated method. Dry it completely before refitting. Avoid foil or liners that the maker excludes, because they may obstruct airflow or contact heated parts. On a hob, keep liquid out of burner openings, switches and seams. Sugary spills may need prompt finish-specific treatment after the surface is safe to touch.
Judge the result before reheating. The targeted deposit should be removed, the cavity should be free of loose cloth fibres and each rack or tray should sit correctly. A chemical odour means more rinsing or airing may be required according to the product instructions. Do not cook food until the appliance is ready for normal use.
You may also enjoy:

Dishwashers: separate soil from a drainage fault
Food debris and grease can collect in an accessible filter, around seals and beneath the door edge. Detergent film or limescale may appear elsewhere. These sources need different responses. Remove loose debris, clean the filter and spray arms only as the manual allows, then refit every component securely.
Do not pour washing-up liquid into the machine or mix a commercial cleaner with vinegar, bleach or another product. The complete dishwasher cleaning sequence covers filters, spray arms, seals and a compatible maintenance cycle.
Standing water, a leak, a repeated error code, poor drainage after the accessible filter is clear or an unusual mechanical sound may indicate a fault. Repeatedly running hot cycles can waste time and may conceal evidence needed for diagnosis.
Inspect the filter before removing it so you know how it sits. Lift out accessible debris with gloves, rinse and soft-brush only as directed, then lock the filter back into its correct position. Check that spray arms rotate freely without forcing them. Use a soft non-metal tool on visible nozzle debris only when the manual approves it. Never enlarge a hole or reach into the pump area.
Microwaves, kettles and coffee machines need model-specific care
Microwave splashes are easiest to remove before they harden. Clean the turntable, accessible interior and door area using the approved method, keeping liquid away from vents and control openings. Damaged door parts, arcing or a burning electrical smell need service, not a stronger cleaner. Follow the dedicated microwave cleaning guide for the full sequence.
Kettles and coffee machines may show limescale or coffee-oil residue. Use the maker’s approved descaling product, concentration and cycle. Rinse for the stated number of cycles and clean removable food-contact parts separately. Do not assume that an acidic kitchen ingredient is suitable for seals, coatings, aluminium or internal lines.
A slower visible flow can be consistent with scale or a dirty removable part. It can also have another cause. Stop if the machine leaks, overheats, produces an error or fails after the approved maintenance process.
Clean food-contact parts such as a coffee carafe, lid, drip tray or approved brew unit separately from the powered body. Match the brush or cloth to narrow openings without pushing residue deeper. Allow every washed part to drain and dry. Complete the maker’s rinse process before preparing a drink, especially after descaling or using a maintenance tablet.
Extractors and filters: airflow changes are a warning, not a diagnosis
Grease and dust can collect on an extractor cover and on filters designed for user maintenance. Check whether the filter is washable, replaceable or not intended for removal. Switch off and isolate as directed, support removable parts and dry washable filters completely before refitting.
Reduced apparent airflow may follow a loaded filter. It may also involve the fan, controls or ducting. Surface extractor cleaning does not authorise dismantling the motor or reaching into inaccessible ducts. Stop if there is unusual noise, vibration, damaged wiring or a persistent burning smell.
Support a removable grease filter with both hands and protect the hob beneath it. Note its orientation before removal. A disposable carbon filter is not automatically washable, and a metal grease filter is not automatically dishwasher-safe. Confirm the exact care route, let washed parts dry fully and make sure latches engage before restoring power.
Book a Kitchen Deep Clean
Enter your postcode to view our rates and availability in your area.

How often should kitchen appliances be cleaned?
There is no reliable universal calendar for every model and household. Usage, the type of food prepared, water hardness, filter design and the manufacturer’s maintenance interval all matter. Clean a fresh spill promptly, then use visible triggers and the manual for deeper work.
| Trigger | Action | Timing rule |
|---|---|---|
| Fresh food or liquid spill | Contain and clean the compatible accessible surface | As soon as the appliance is safe to clean |
| Crumbs, loose debris or grease film | Empty the approved collector and clean accessible surfaces | Before build-up interferes with normal use |
| Odour that returns | Find hidden food, residue, standing water or a fault | Investigate the source, not the calendar |
| User-cleanable filter looks loaded | Wash, dry or replace it exactly as directed | At the manual interval or earlier visible trigger |
| Scale or slower visible flow | Run the approved descaling process | Use the maker’s interval and local water conditions |
| Smoke, leak, error or electrical sign | Stop use and move to repair or specialist advice | Immediately, without another test cycle |
Why clean kitchen appliances regularly?
Routine cleaning keeps accessible food residue, grease and limescale visible and manageable. It also gives you a chance to notice a damaged seal, loaded filter, leak or unusual mark before the next normal use. In food areas, prompt spill control supports the wider food-safety cleaning routine.
Cleaning cannot prove that an appliance is free of harmful microorganisms, make spoiled food safe, guarantee lower energy use or extend a product’s life by a fixed amount. It also cannot correct worn parts, electrical faults, drainage problems or poor installation. Describe the benefit in terms of removed soil and an observable result.
After cleaning, the surface should be visibly free of the targeted residue, removable parts should be dry and secure, and no product should remain where rinsing is required. Stop if the original odour, smoke, leak, noise or error returns.
How Samyx Cleaning can help with appliance build-up
A Samyx one-off clean can include kitchen degreasing and exterior appliance surfaces within the agreed scope. Inside-oven cleaning is a separately priced add-on. Confirm any internal appliance request before booking, because it should never be assumed from a general kitchen clean.
The service is suitable when accessible grease and residue form part of a wider kitchen or whole-home reset. It is not an appliance-repair visit and does not include dismantling, filter or component replacement, gas or electrical work, hidden pumps and hoses, pest treatment or investigation of smoke, leaks and error codes. Review the current one-off cleaning scope and state the priority areas when requesting a quote.
Frequently asked questions
-
How often should appliances be cleaned?
Clean fresh food and liquid spills as soon as the appliance is safe to handle. Use visible grease, crumbs, odour, scale, filter loading or restricted flow as further triggers, then follow the manufacturer’s interval for filters, descaling and maintenance cycles. Smoke, leaks, electrical signs, errors or unusual noise need immediate assessment, not another cleaning schedule.
-
How to clean kitchen appliances naturally?
Start with the appliance manual, not the word natural. Water, vinegar, bicarbonate, lemon, steam and plant-based products can still be unsuitable for electrical openings, aluminium, seals, coatings, stone or internal lines. Use only a method and concentration approved for the model and every material it touches, and never mix cleaning products.
Important: Follow the appliance and cleaning-product instructions over general guidance. Switch off, unplug or isolate only as directed, let heated parts cool, keep liquids away from electrical openings and never mix cleaning products. Remove only approved user-cleanable parts and refit them dry and secure. Stop use and seek suitable help for persistent smoke, sparking, damaged cables, gas odour, leaks, standing water, unusual noise, error codes, repeated tripping or any fault that returns after accessible residue is removed.
Plan a One-Off Deep Clean
Enter your postcode to view our rates and availability in your area.
Author: Svetlana Georgieva (Clara)
Hi, I’m Svetlana Georgieva, but you can call me Clara. As the co-founder and heart behind Samyx Cleaning, I’m devoted to sharing the art of a clean space. Let’s journey into a cleaner, more joyful life together with tips from London's cleaning experts.

Discover more of our cleaning secrets: