
Dishwasher Cleaning: Filter, Spray Arms, Seals and a Safe Maintenance Cycle

Last modified on: 30/07/2026

Dishwasher cleaning works best as a component-by-component job: remove trapped food first, clean only the parts your manual says are removable, then use a compatible maintenance cycle if the machine still needs one. Starting with a bottle of cleaner can leave the filter, spray arms and door edges untouched. A universal DIY recipe may also be unsuitable for the seals, metalwork or dosing system in your model.
Key takeaways
- Clean the accessible components before asking a maintenance cycle to deal with residue.
- Treat food, grease, detergent film and mineral scale as different problems.
- Your model manual controls removal, refitting, product choice and programme temperature.
- Dishwasher salt, rinse aid, detergent, machine cleaner and descaler have different jobs.
- A no-drain fault, leak, electrical symptom or damaged part is not a deeper-cleaning challenge.
Table of Contents
Dishwasher cleaning starts with a safe diagnosis
Look at what the machine is leaving behind before choosing a method. Food around the filter with a sour odour calls for manual removal. Chalky deposits point towards hard water. Grease feels slippery; loose white powder can come from detergent dosing, the salt cap or water-softener settings. One cleaner cannot correct all four.
| What you notice | Likely first source | Safe first check | Stop or escalate when |
|---|---|---|---|
| Food pieces or a musty odour | Filter, lower lip or door edges | Remove visible debris and clean accessible parts | Standing water or the odour persists |
| Poor cleaning or gritty dishes | Filter or spray-arm holes | Check filter seating, visible blockage and free arm rotation | An arm is damaged, the pump is noisy or failure repeats |
| Greasy film | Filter, seals or low-temperature residue | Clean components, then use a compatible machine-cleaner cycle | Film returns despite correct loading and detergent |
| White chalky deposit | Mineral scale | Check dishwasher salt, hardness setting and approved descaler | Parts are affected or the mark may be glass damage |
| Loose white powdery film | Detergent or softener mismatch | Check dosing, salt cap, rinse aid and hardness setting | A cap is damaged, a leak appears or residue keeps returning |
| Water left in the base | Accessible blockage or drain fault | Stop the cycle and remove only debris above the accessible filter | Pump, hose or drain-system access is required |
| Leak, burning smell or electrical trip | Mechanical or electrical fault | Switch off and isolate the appliance | Always; arrange appliance service |
The table is a starting route, not a remote diagnosis. Residue can have more than one cause, and the same symptom may return if a removable part is not seated correctly. Do not keep adding stronger products to an unexplained fault.
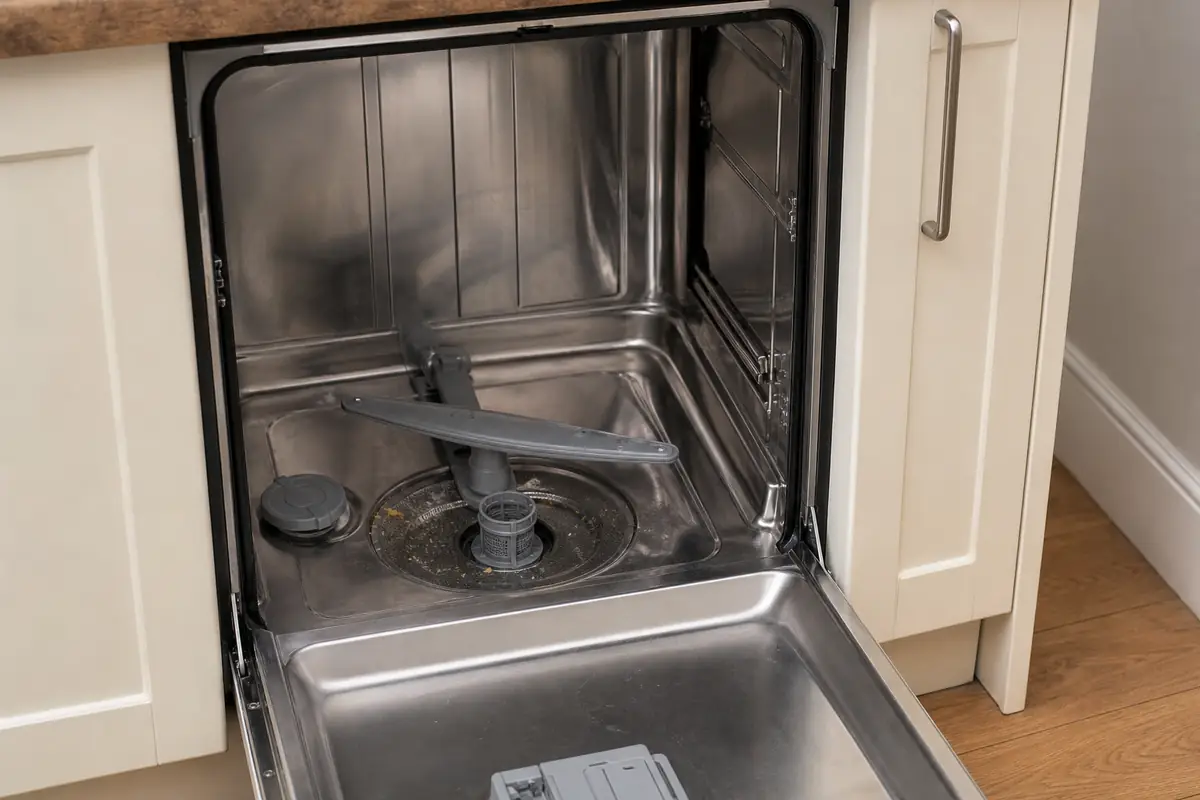
Record the starting condition before cleaning. A quick photograph of the base, filter position and residue pattern gives you something to compare after the next normal load. Note whether the mark is dry or greasy, where it is concentrated and whether water is present after the programme has fully ended. This small check helps separate a one-off dirty load from a repeating dosing, drainage or water-hardness problem.
Prepare the dishwasher and gather safe tools
Finish or cancel the programme, switch the appliance off and allow hot parts and water to cool. If the plug is safely accessible, isolate it as the manufacturer advises. Empty the racks and remove loose food with a paper towel or gloved hand. Place an old towel at the front so water from a wet filter does not spread across the floor.
Useful tools are deliberately simple: a soft cloth, a small soft nylon brush, a shallow bowl or tray, warm water and whatever mild detergent or machine-care product the manual permits. Keep the model number or digital manual nearby because filter locks, spray-arm clips, salt systems and cleaning programmes differ. Manufacturer component guidance also shows why accessible parts are cleaned separately before a maintenance cycle.
Work in a clear sequence and keep removed parts together. Lay them on a towel in removal order, check small seals or clips have stayed in place and never force a part that feels fixed. A phone photograph can prevent a clean component being refitted at the wrong angle. Keep children and pets away from the open appliance, loose residue and any care product during the job.
Do not put ordinary washing-up liquid in a dishwasher. Its foam is designed for sink washing and can overflow a machine. Do not combine descaler, bleach, vinegar, bicarbonate or another cleaner. Even when two products are individually familiar, their mixture can cancel the useful chemistry, release irritating fumes or affect components.
Clean the dishwasher filter
The filter is usually the most useful first component because it catches particles before they recirculate. Pull out the lower rack and compare what you see with the manual. Some filter assemblies twist and lift; others have several pieces or a different locking sequence. Photograph the fitted position if that will help you refit it correctly.
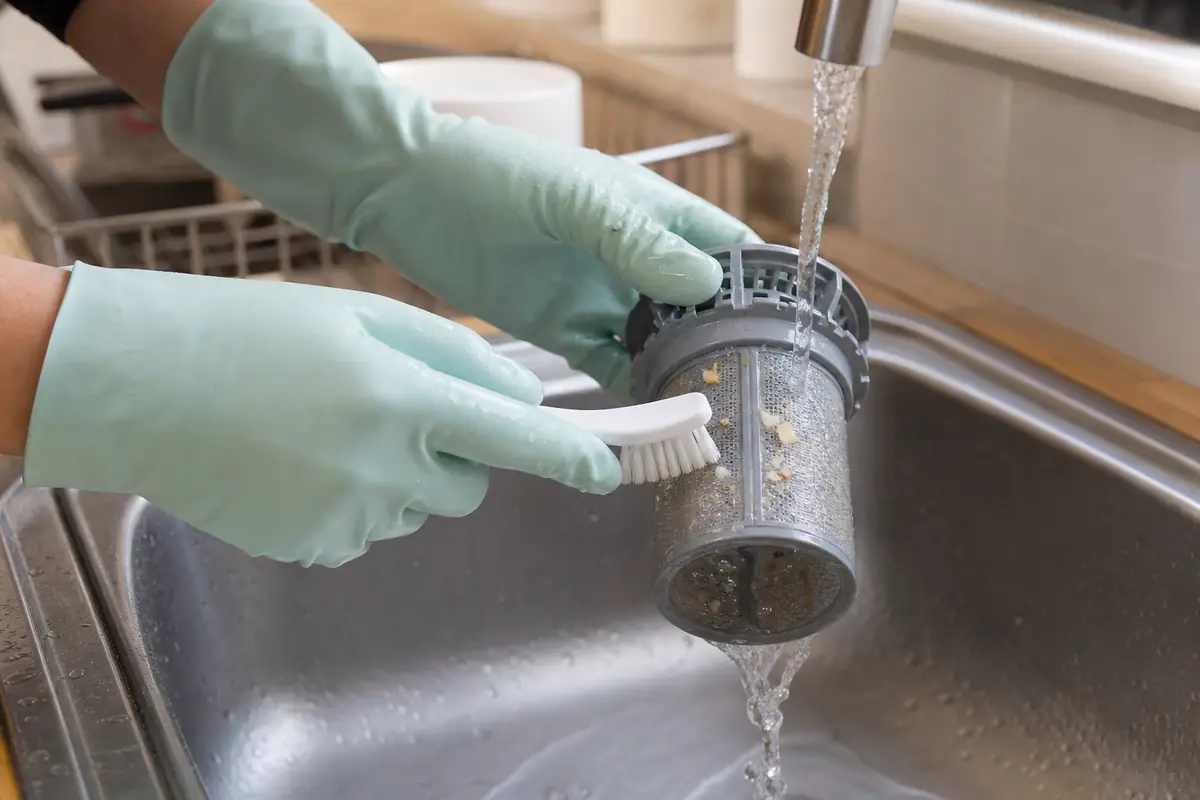
Lift away loose debris before rinsing. Carry the filter level to the sink, rinse it with warm water and use a soft brush on greasy mesh or crevices. Work gently enough to keep fine mesh, plastic catches and seals intact. A sharp utensil can tear the screen and create a route for larger particles.
Wipe only the accessible area around the filter opening. Do not reach into a hidden pump, remove a fixed cover or probe the drain with a tool. If glass may be present, do not search by touch. Refit every approved removable piece in the correct order and confirm that the lock has engaged. A clean filter that is loose or upside down can still cause poor results.
Inspect the filter under good light before it goes back. Torn mesh, a cracked frame, a missing seal or a damaged locking tab can allow debris to pass or prevent correct seating. Cleaning cannot repair those faults. Once refitted, press only where the instructions show, check that the assembly sits level and remove any towel or tool from the tub before replacing the rack.
Clean the spray arms without damaging the nozzles
Turn each spray arm by hand when the machine is cool and switched off. It should move without hitting a tall utensil, displaced rack or protruding item. Look for visible food or scale in the holes. If the manual allows the arm to come off, follow its clip, nut or lifting sequence. Never pull against resistance.
Rinse a removable arm and let water move through it. A soft non-metal pick or brush may be suitable for a visible loose particle only when the manufacturer permits it. Do not push metal wire into a nozzle, drill a hole larger or force debris deeper into the arm. Distorted jets change how water reaches the load, and damage is not repaired by a hotter cycle.
Check both faces before refitting and make sure the arm turns freely. If it is split, warped, loose on its mount or repeatedly blocked from inside, replacement or appliance service is a better route than aggressive cleaning.
A removable arm may hold loose particles that move when it is tilted. Flush it in the direction stated by the maker and let it drain fully over the sink. Do not strike it against the sink or try to split a sealed arm. After refitting, spin it once and check its clearance at each rack position. A bent rack wheel or incorrectly placed utensil can mimic a spray-arm fault.
Wipe the seals, door edges and tub
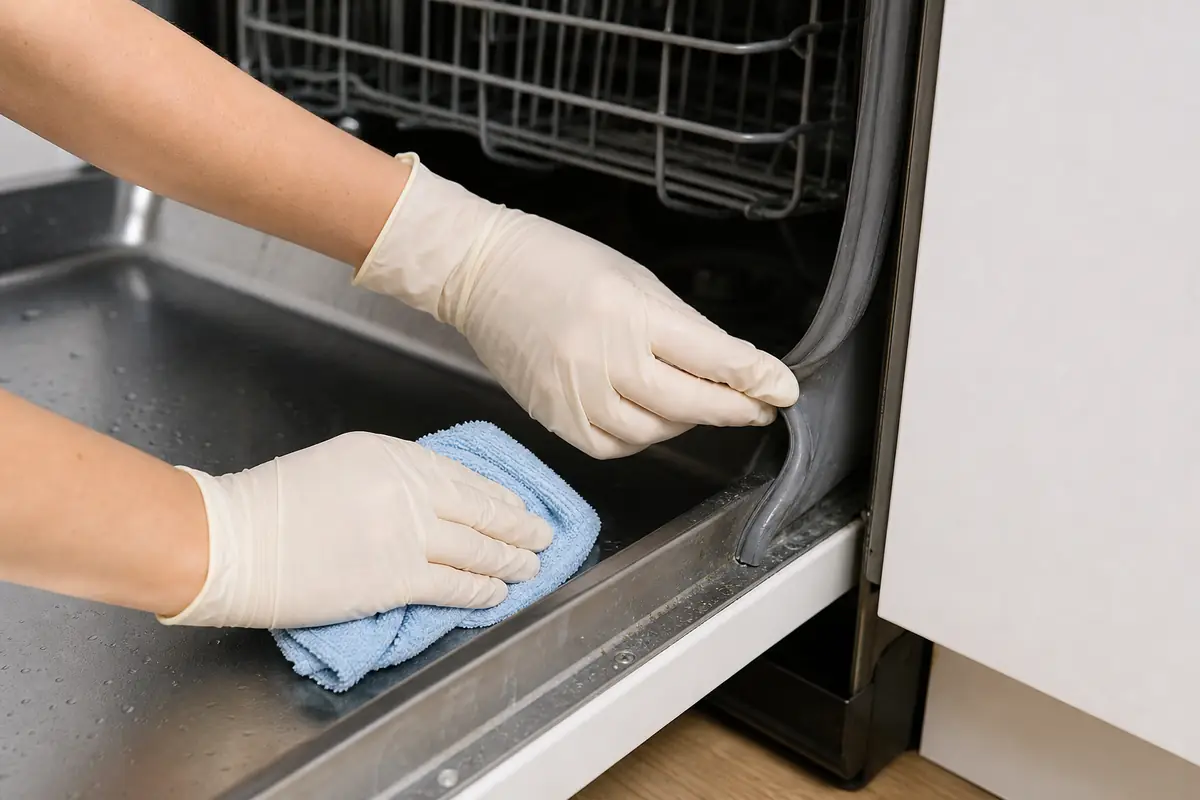
Programme water does not wash every fold around the door. Damp residue can collect on the lower lip, hinges, detergent-dispenser edge and rubber seal. Put a small amount of a compatible mild solution on the cloth; keep sprays away from controls and gaps. Wipe along accessible folds, rinse the cloth as it becomes dirty and dry the edge afterwards.
Do not pull a seal hard enough to stretch it or use a harsh brush on soft rubber. If it is split, hardened, displaced or leaking, cleaning will not restore the seal. Dark marks that return quickly may also indicate moisture trapped beyond the accessible surface and deserve inspection, not repeated bleaching.
For the tub, remove loose material and wipe obvious grease before adding a cleaner. Stainless-steel interiors can still be scratched by abrasive powder or pads; plastic interiors can stain without being dirty. Keep the same compatibility rule for racks, coated tines, rails, the salt cap and the detergent compartment. Good food-safe kitchen cleaning also means washing your hands and cleaning the surrounding worktop after handling the filter.
Open the detergent flap and wipe only its accessible surfaces with a barely damp cloth. Dried product around the hinge can restrict movement, yet flooding the dispenser can carry moisture towards mechanisms. Check rack rails and coated tines for caught labels, food and rusting damage. Remove loose soil gently and route damaged coatings or exposed metal to the manufacturer, since repeated scrubbing can enlarge the defect.
Choose a compatible dishwasher cleaning cycle
A maintenance cycle is the finishing step, not a substitute for removing trapped food. Decide what product the machine actually needs. Dishwasher detergent cleans a load. Machine cleaner targets grease and internal residue during a specified programme. Descaler targets mineral deposits. Dishwasher salt supports the built-in water-softening system. Rinse aid changes how water leaves dishes and surfaces. They are not interchangeable.
Read both the appliance manual and product label. They control whether the machine must be empty, where the product goes, which programme to select and whether detergent is omitted. “Hottest and longest” is not a universal instruction: some care products use a particular temperature, and some machines have a named cleaning programme.
When the cycle finishes, let steam clear safely and inspect the same places you photographed. The filter area should be free of loose food, the arms should rotate and the seals should have no greasy coating. A remaining mark may need a different diagnosis, not an immediate second dose. Rinse or run another programme only when the product instructions require it.
DIY searches often combine vinegar, bicarbonate and homemade detergent into one answer. Keep those decisions separate. Acid may affect some seals, metal finishes or dosing systems, and bicarbonate can leave abrasive or alkaline residue. Never mix the two in the machine, and do not pour vinegar into the rinse-aid reservoir unless the appliance maker explicitly permits it. Familiarity does not remove the material and use restrictions that apply to white vinegar limits.
Deal with odour, white film and limescale correctly
For odour, work from source to symptom. Remove food from the filter and lower edge, clean the seals and check for standing water. A fragrance or deodorising cycle may briefly cover a smell even when residue remains. If the odour resembles burning, hot plastic or electrics, stop using the machine and arrange service.
White marks need a closer look. Dry chalky scale on the tub or heater area is consistent with hard-water minerals; a loose powder can be undissolved detergent; cloudy glass can be a removable deposit or permanent surface damage. Test the residue on an inconspicuous accessible area and check dosing before assuming that more acid is the answer.
In London hard-water areas, confirm that the dishwasher salt reservoir is filled with dishwasher salt, its cap is clean and secure, and the appliance hardness setting matches the local supply and manual. Use rinse aid at the recommended setting; it is not a descaler. If scale remains, follow the approved dishwasher-descaling route. Chalky deposits on taps and shower screens need the relevant household limescale methods. Inside the dishwasher, model instructions govern.
Build a dishwasher maintenance routine
Use condition as well as the calendar. A busy household with hard water and food-heavy loads may need checks sooner than an occasional user. The manual remains the final frequency source. This compact routine helps you notice change before residue becomes a fault.
- After a load: remove obvious debris, leave the machine as the manual advises for drying, and check that no item has blocked an arm.
- When visible: wipe the lower door edge and fresh spills before residue dries.
- Regularly: inspect the filter, spray holes, salt level and rinse-aid indicator; clean at the interval stated for your use and model.
- Periodically: run the approved empty maintenance or descaling programme when the manual, indicator or residue pattern calls for it.
- After any change: recheck dosing and hardness settings when you move home, change detergent format or notice persistent film.
Loading habits support the routine. Scrape large scraps without turning pre-rinsing into a full hand wash, keep labels and loose paper out of the machine, and place items so they cannot stop the spray arms. Do not overload racks or block the detergent door. These habits reduce avoidable residue. Filter cleaning remains a separate task.
Keep a short note if the same problem returns. Record the detergent type and dose, salt and rinse-aid indicators, hardness setting, programme used and where the residue appeared. Change one variable at a time and follow the manual. Several simultaneous changes make it difficult to see whether the improvement came from filter cleaning, correct loading, dosing or water-softener adjustment. Persistent results after the correct settings and maintenance point towards service, not an endless product experiment.
You may also enjoy:

When dishwasher cleaning is not enough
Cleaning can correct accessible food, grease, film and scale. It cannot repair a failed seal, cracked spray arm, loose rack coating, faulty heater, damaged pump or electrical problem. Stop using the appliance if it leaks, trips the electrics, smells of burning, makes a new grinding sound or shows heat damage.
Water left in the base deserves the same boundary. Remove only visible debris that the manual identifies as accessible. Do not take apart the pump, pull the machine out, disconnect hoses, use a chemical drain unblocker or reach into an unseen cavity. A blocked household waste connection, kinked hose, failed pump and incorrectly seated filter can look similar from above. Each needs different work.
If poor results continue after correct component cleaning, refitting, detergent dosing and hardness settings, record the model, warning code, sound and stage at which the fault occurs. That information is more useful to the manufacturer or appliance engineer than another stronger cleaning cycle.
How Samyx Cleaning can help
A dishwasher can be one small part of a kitchen that needs a reset. Samyx Cleaning can help with the wider room and agreed accessible cleaning tasks through one-off cleaning. Confirm appliance-related tasks when booking so the scope is clear.
This is not an appliance-repair promise. Pumps, hoses, wiring, fixed internal parts, leaks and model-specific faults belong with the manufacturer or a qualified appliance engineer. Keeping that boundary clear protects both the machine and the person working around it.
Book One-Off Cleaning
Enter your postcode to view our rates and availability in your area.

Conclusion
A reliable clean follows the way residue travels through the machine. Start at the accessible filter, check the spray path, wipe the parts a normal programme misses and identify whether the remaining mark is grease, detergent or scale. Select the compatible maintenance product and cycle only after those checks.
That order does more than remove visible grime. It prevents a cleaning product from masking a blocked component and makes it easier to recognise when the machine has crossed from routine care into repair.
Frequently asked questions
-
What is the best way to clean a dishwasher?
Switch it off, let it cool and follow the model manual. Remove visible debris, clean and refit the accessible filter, inspect the spray arms, wipe the seals and door edges, then run an empty maintenance cycle with an approved product if needed. Diagnose scale, detergent film and faults separately.
-
Can I pour vinegar in my dishwasher to clean it?
Only if the dishwasher manufacturer explicitly permits that method for your model and tells you where and how to use it. Vinegar is not a universal machine cleaner and should not be poured into the rinse-aid or salt reservoir unless the manual expressly allows it. Never mix it with other cleaners.
-
How often does a dishwasher need maintenance?
Follow the appliance manual and respond to use, soil and water hardness. Check visible debris and arm movement during normal use, clean the filter and edges when needed, monitor salt and rinse aid, and run the specified maintenance or descaling programme at the manufacturer’s interval.
-
What does limescale look like in a dishwasher?
Limescale is usually a dry, chalky white or off-white mineral deposit on the tub or components. Loose white powder may be detergent or salt residue. Cloudy glass can be a removable deposit or permanent damage. Confirm the cause before choosing a descaler.
Important: Dishwasher filters, spray arms, seals, salt systems and cleaning programmes vary by model. Switch the appliance off and let it cool before removing any part, then follow the manufacturer’s instructions for removal, refitting and approved products. Never mix cleaners, put washing-up liquid in the machine, force blocked holes with metal wire, pour cleaner into the rinse-aid or salt reservoir unless the manual expressly permits it, or dismantle pumps, hoses or electrical parts. Stop and arrange appliance service if the machine will not drain, leaks, trips the electrics, smells of burning, has damaged seals or parts, or still performs poorly after accessible maintenance.
Author: Svetlana Georgieva (Clara)
Hi, I’m Svetlana Georgieva, but you can call me Clara. As the co-founder and heart behind Samyx Cleaning, I’m devoted to sharing the art of a clean space. Let’s journey into a cleaner, more joyful life together with tips from London's cleaning experts.

Discover more of our cleaning secrets: