
Grout Cleaning: Safe Methods for Floors and Bathrooms

Last modified on: 02/08/2026
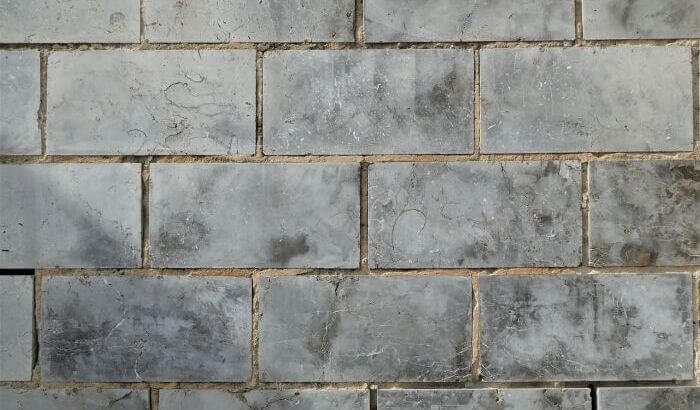
Grout cleaning works best when you identify the grout, adjacent tile, sealer and type of soil before choosing a product. Remove loose dirt, start with the least aggressive compatible cleaner, test a small area, agitate with a soft nylon grout brush, remove the dirty solution and complete the label’s rinse and drying steps.
Key takeaways
- Grout is a joint material, not an isolated line: the cleaner also touches tile, stone, sealant and metal fittings.
- Cement-based grout, epoxy grout and an unknown repaired joint do not automatically accept the same chemistry or moisture.
- A successful clean removes soil and product residue; it does not have to turn coloured grout white.
- Vigorous scrubbing and stronger chemistry can expose or enlarge damage that cleaning cannot repair.
- Recurring black or green growth, persistent damp, powdering joints and water movement need diagnosis beyond routine cleaning.
Table of Contents
Grout cleaning starts with material identification
Begin with any installer record, product pack, care sheet or information from the tile maker. Cement-based grout is often more porous than epoxy or resin grout, and appearance alone is unreliable. A sealer, colourant, previous repair or accumulated cleaner film can change the surface. If the grout type is unknown, treat that uncertainty as a reason to use a smaller test and milder method.
Identify the surface on both sides of the joint. Glazed ceramic and porcelain may tolerate a different product from unsealed terracotta, marble, limestone, glass, decorative metal or a coated tile. Guidance for ordinary tile stains does not override the grout or sealer instructions. Where the joint borders natural stone, acid sensitivity and sealer compatibility become controlling checks.
| What you find | Start with | Avoid assuming | Stop signal |
|---|---|---|---|
| Sound cement-based grout with routine soil | Compatible mild labelled cleaner and soft nylon brush | Porous means every DIY paste is safe | Sand loss, softening or colour transfer |
| Epoxy or resin grout | Maker-approved maintenance method | Its stain resistance permits strong solvent or abrasion | Dulling, tackiness or surface change |
| Sealed or coloured grout | Product approved for the sealer and colour | Whitening is the desired result | Patchy colour, gloss loss or sealer lift |
| Grout beside natural stone or metal | Method approved for every contacted material | A grout-safe acid is stone- or metal-safe | Etching, darkening, corrosion or finish change |
| Unknown grout or previous repair | Small dry inspection and discreet mild test | Similar-looking sections are the same material | Uneven reaction or material lifting |
| Cracked, missing, loose or powdering joint | Condition assessment before cleaning | Cleaner or sealer will rebuild the joint | Movement, widening crack or water ingress |
Prepare the area and choose one product
Ventilate the room and keep other people and pets away from the working area. Read the product label before opening it, including its surface exclusions, protective equipment, dilution, dwell time, ventilation and rinse instructions. Wear the protection stated for that product and task. Never transfer a cleaner into an unlabelled food or drink container.
Remove toiletries, mats and loose items. Vacuum a dry floor with suitable equipment or sweep carefully so grit is not dragged across tile. In a shower, remove loose hair and surface debris. Protect drains and nearby surfaces only with coverings permitted for the cleaner and make sure the room remains safely usable. Clean the adjacent tile’s ordinary film first when its approved method differs from the grout treatment; this makes it easier to see what remains in the joint.
Use one product at a time. Old cleaner, descaler or bleach residue can remain in joints and corners, so rinse it away as its label directs and let the area dry before a different process. The general rules for chemical safety apply even when a recipe is described as household or natural.
Make the test area meaningful
Choose a discreet section that includes the grout and the adjacent surface. Photograph it in even light if colour change would be difficult to judge. Apply the proposed method to a small length, complete every removal and rinse step, and inspect only after it is dry. A wet joint can look temporarily darker and make a poor test appear successful.
- Check for colour on the cloth or brush.
- Look for grit or sand released from the joint.
- Compare tile gloss and grout texture with the untreated area.
- Confirm that residue can be removed without flooding the joint.
- Stop if a crack widens, the joint feels soft or a previous repair begins to lift.
Best way to clean grout step by step
- Remove dry debris. Vacuum or sweep grit, hair and crumbs so the wet stage does not turn them into abrasive slurry.
- Start mild. Use a compatible pH-neutral or maker-approved maintenance cleaner at the labelled strength. Do not increase concentration to compensate for short dwell time.
- Apply with control. Work in a manageable section. Keep product away from excluded stone, metal, wood, sealant or painted finishes.
- Observe the dwell time. Give the product the stated contact time without allowing it to dry on the surface.
- Agitate gently. Use a soft or medium nylon grout brush permitted by the maker. Work along the joint and avoid cutting into edges with a metal brush or sharp tool.
- Remove the dirty solution. Lift it with clean cloths, a compatible wet-extraction method or repeated clean-water pickup as appropriate. Moving grey water across the floor only redistributes soil.
- Complete the final step. Rinse, neutralise or wipe only as the label and material instructions require, changing the water or cloth before it becomes dirty.
- Dry and inspect. Ventilate, remove standing water and judge colour, residue and joint condition after full drying. Repeat the same compatible route once if the label permits; do not jump automatically to mixed chemicals.
Adapt the sequence to floors, walls and showers
On a floor, divide the room into sections that you can scrub and recover before the solution dries. Begin at the far side and leave a safe exit route. Keep clean water, dirty water and unused product separate. A flat mop may clean the tile face without reaching a recessed joint, so inspect the grout line at floor level and use a controlled brush only where needed. Do not flood edges, thresholds, expansion joints or areas with cracked grout.
On a wall or shower enclosure, apply only enough product to maintain the labelled contact time without uncontrolled runs. Work from a manageable upper section downwards, catching runoff before it reaches excluded stone, metal, silicone, painted surfaces or the shower tray. Corners and changes of plane are commonly flexible sealant, not grout; use the method approved for that sealant and do not scrub a lifting edge as if it were a stained cement joint.

Choose the next step by soil or stain
Routine dust and tracked soil
Floor grout often looks dark because fine soil settles below the tile face. Dry removal matters first. Follow with the mild compatible method, work in small sections and lift dirty water before it dries back into the joints. Repeated clean-water pickup may improve the result more than stronger chemistry.
Soap film and body oils
Shower grout can hold a layered mix of soap, skin oils and mineral residue. Begin with a cleaner approved for the tile, grout and sealer and intended for that soil. Remove ordinary oily film before judging remaining mineral deposit or discolouration. One cleaner should be removed completely before a separate compatible process is considered.
Kitchen grease
A compatible degreasing product may be more relevant than an abrasive whitening paste. Protect nearby painted units, metal trims and worktops, use the labelled dilution and remove emulsified grease with clean cloths or extraction. Avoid flooding floor joints or pushing solution beneath loose edge tiles.
Mineral residue and white deposits
A white mark may be limescale on tile, dried cleaner, salt movement through a cement joint or the grout’s original colour becoming visible. These causes need different responses. Acidic descaler may be excluded by cement grout, natural stone, metal fittings or sealer. Identify where the deposit sits and consult the relevant makers before using an acid.
Colour change and deep staining
Compare the joint with an inconspicuous original section. Coloured grout may have faded, a sealer may be patchy, or a stain may sit below the cleanable surface. Stop repeated abrasion when no more soil transfers. Recolouring, stain treatment, sealer removal or regrouting is a restoration decision, not proof that the cleaning method was too weak.
Installation haze or building residue
Residue after tiling can be grout haze, adhesive, sealant or building dust. Do not scrape blindly or use an acid based on appearance alone. Confirm the tile and grout system, how long it has cured and which remover the installer or manufacturer permits. Valuable surfaces and widespread haze are better assessed professionally.
Products and tools that need extra caution
Vinegar and other acids
White vinegar is not a universal grout cleaner. Acids can attack calcium-based stone, affect some cementitious joints, disturb sealers and damage nearby metal or finishes. A surface being called tile does not establish acid compatibility. Never combine vinegar with bleach, peroxide or another cleaner.
Hydrogen peroxide and bicarbonate
A labelled hydrogen peroxide product may have permitted uses, and concentration alone does not create a universal grout method. Peroxide can affect colour, finishes and adjacent materials. Bicarbonate adds abrasive particles and can leave residue in textured joints. Do not improvise a paste, ratio or dwell time from a generic recipe, and do not mix the two unless a manufacturer explicitly supplies that exact method.
Bleach and disinfectants
Whitening is not the same as cleaning, stain removal or disinfection. Use a disinfectant only when it carries the required claim for the intended surface and task, after any stated pre-cleaning, and follow its contact time, ventilation, PPE and rinse directions. Never mix bleach with acids, ammonia, peroxide or another cleaner. Do not use smell or visible colour loss as evidence that a joint is safe or clean.
Steam and powered brushes
Steam is permitted only when the tile, grout, sealer, waterproofing system and appliance instructions all allow it. Heat, pressure and moisture can be unsuitable for failed joints, loose tiles, nearby wood or some sealers. Powered brushes also increase abrasion quickly. Use only an approved head and pressure, keep it moving and stop at the first change in colour or texture.
You may also enjoy:

When dark grout is mould, soil or failed material
Black or green spotting in a shower may be surface growth, trapped soil, staining, discoloured sealant or deterioration. Routine U067 coverage stops at recognising the difference. Remove ordinary surface soil with the compatible method and inspect the dry joint. Do not keep bleaching a mark whose moisture source and material condition are unknown.
Recurring growth, a persistent musty smell, damp returning through the joint, failed silicone, loose tile or a large affected area needs cause-led assessment. Improve ventilation and fix obvious condensation or leaks where safely possible. Cleaning alone does not reach hidden growth or repair waterproofing. Specialist remediation may be needed when contamination extends beyond a small cleanable surface.
Judge the result only when the joint is dry
A wet cement joint normally looks darker, and fresh cleaner can leave a temporary sheen. Give the test section enough drying time for a fair comparison with untreated grout. View it under the same lighting and from more than one angle. Run a clean white cloth over the dry surface: transferred grey soil suggests more removable residue, transferred pigment may indicate unstable colourant, and loose grit points to material loss. Record which observation occurred instead of treating every dark line as dirt.
Compare cleaned sections with a protected edge under a cabinet, behind a removable fitting or in another low-wear position only when the construction appears consistent. The original shade may never have been bright white. An even, sound joint that no longer releases soil can be clean despite permanent discolouration. Escalating abrasion to chase a colour target can widen the surface, expose aggregate and make future soiling more visible.
Know when to stop cleaning and repair the grout
| Dry condition | What it may mean | Next step |
|---|---|---|
| Sound joint, soil still transfers | Cleaning process is still removing residue | Repeat the same compatible route if the label permits |
| Sound joint, no more soil transfers | Remaining colour may be stain, fade or original grout | Stop abrasion; assess recolouring or restoration separately |
| Powder or sand releases | Joint may be deteriorating or attacked | Stop and obtain grout-system advice |
| Crack, gap or movement | Cleaning cannot rebuild the joint | Assess repair, substrate and possible water path |
| Loose tile or hollow movement | Bond or substrate issue may be present | Keep water out and use a tiling professional |
| Patchy sealer or colourant lifts | Coating incompatibility or failure | Stop; identify the coating before restoration |
| Recurring damp or growth | Moisture source may remain | Diagnose leak, ventilation, silicone and hidden-area risks |
Sealing is not an automatic final step. Some grout systems do not need a penetrating sealer, and a sealer cannot fix wet, contaminated, cracked or powdering material. If sealing is appropriate, follow the grout and sealer makers’ preparation, drying, application and curing instructions. Do not seal over active staining or moisture simply to make the surface look even.
Keep grout cleaner without a rigid calendar
Cleaning frequency depends on room use, ventilation, water hardness, cooking grease, floor traffic, pets, surface texture and how quickly soil becomes visible. Remove spills and loose grit promptly. In showers, use ventilation, remove standing water from compatible surfaces and allow the room to dry. On floors, place mats where appropriate and clean them before they become another source of grit.
Use the grout’s condition as the trigger. A light maintenance clean before soil becomes compacted is easier to control than repeated aggressive restoration. Keep a note of the compatible product and test result, especially where several bathrooms, floor types or previous repairs look similar. Recheck seals, silicone and cracks during cleaning; do not hide them with colourant or stronger chemistry.
Where Samyx Cleaning can help
Samyx can include compatible bathroom and hard-floor cleaning within a broader one-off cleaning visit after the surface, product and condition are checked. Cleaning cannot guarantee removal of permanent grout staining and does not replace regrouting, sealing, tiling repair, leak investigation, waterproofing work or mould remediation. Those conditions should be routed to the appropriate trade or specialist.
Book One-Off Cleaning
Enter your postcode to view our rates and availability in your area.

Conclusion: Let the joint condition choose the method
Safe grout cleaning is a sequence of identification, controlled chemistry, gentle agitation, soil removal and dry inspection. The best result is a sound joint free from removable soil and residue, not an artificially white line achieved by escalating products. When the clean, dry material shows stains, coating failure, cracks, movement or recurring moisture, stop cleaning and solve the condition that the grout is revealing.
Frequently asked questions
-
What is the best way to clean grout?
Identify the grout, adjacent surface, sealer and soil first. Remove loose dirt, use the least aggressive compatible labelled cleaner, test a small area, follow the dwell time, agitate with a soft nylon brush, remove the dirty solution and complete the stated rinse and drying steps.
-
Can vinegar damage grout?
Yes. Acid can affect some cement-based grout, sealers, natural stone, metal and nearby finishes. Do not use vinegar unless every contacted material and product maker permits it, and never combine it with bleach, peroxide or another cleaner.
-
How do you get grout white again?
First confirm that the grout was originally white and remove ordinary soil with a compatible method. Remaining colour may be a deep stain, faded colourant, patchy sealer or material deterioration. Stop repeated abrasion when no more soil transfers and assess recolouring, restoration or regrouting separately.
-
Can you use a steam cleaner on grout?
Only when the tile, grout, sealer, waterproofing system and steam-cleaner instructions all permit it. Avoid steam on cracked or loose joints, failed sealant, unknown repairs and adjacent heat- or moisture-sensitive materials.
Important: Grout, tile, stone, sealers, colourants, silicone and cleaning products vary. Follow the instructions for every material the cleaner may touch, use the stated ventilation and protection, and test only where those instructions allow. Never mix cleaners or improvise stronger concentrations. Stop for colour transfer, etching, gloss change, softening, powdering, widening cracks, loose tiles, failed silicone, persistent damp or recurring growth, and use the appropriate tiling, leak, restoration or remediation specialist.
Author: Svetlana Georgieva (Clara)
Hi, I’m Svetlana Georgieva, but you can call me Clara. As the co-founder and heart behind Samyx Cleaning, I’m devoted to sharing the art of a clean space. Let’s journey into a cleaner, more joyful life together with tips from London's cleaning experts.

Discover more of our cleaning secrets: