
End of Tenancy Skirting Board Cleaning: Finish-Safe

Last modified on: 22/07/2026

End of tenancy skirting board cleaning starts with dry dusting, a finish check and very little moisture, followed by a careful inspection after the boards have dried. That order removes ordinary soil without turning dust into grey residue. It also keeps chipped paint, swollen MDF and deep scratches in the repair category.
Quick answer: dust, test, wipe and dry
- Vacuum with a soft brush or use a dry microfibre cloth before adding water.
- Check whether the board is painted timber, sealed wood, PVC or MDF, and note chips, swelling or exposed edges.
- Test a hidden area, then wipe a small section with a well-wrung cloth and a mild solution that the finish allows.
- Remove residue, dry the top edge and joints, then inspect again in good light before taking check-out photographs.
Key takeaways
- Loose dust comes off dry. Water added too early creates streaks and pushes soil into joints.
- A cleanable mark sits on the finish. Paint loss, deep scratches, swelling and open joints need repair or decorating decisions.
- Minimal moisture matters most around MDF, chipped coatings, floor edges and older painted woodwork.
- Check-out evidence is strongest after the boards are dry and the room has received its final floor clean.
Table of Contents
Check the finish before adding moisture
Skirting boards can look similar and react very differently to water and abrasion. Painted timber may tolerate a lightly damp cloth when the coating is sound. Factory-finished MDF usually needs much tighter moisture control, especially along cut edges and joints. Bare wood, flaking paint and an unknown specialist finish need care instructions or professional advice before wet cleaning begins.
Run a dry white cloth over the surface first. Grey or brown soil on the cloth points to removable dust and grime. A coloured trace that matches the paint may mean the coating is transferring. A raised edge, soft patch, bubbling or swelling suggests damage that more water can worsen. Stop at that point and do not scrub harder.
| What you see | Likely issue | Safest next step | Stop when |
|---|---|---|---|
| Loose grey dust on the top edge | Dry surface soil | Vacuum with a soft brush, then use a dry microfibre cloth | The nozzle catches a loose edge or cable |
| Finger marks or dull grime on sound paint | Cleanable surface soil | Hidden test, then a well-wrung cloth with a mild approved solution | Colour transfers, the finish dulls or becomes tacky |
| A dark line beside the floor | Compacted dust, floor-cleaning residue or a scuff | Dust first, isolate a small area and use minimal pressure | The line is paint loss, a deep scratch or floor-finish damage |
| Chips, cracks, bubbles or swollen MDF | Coating or board damage | Keep the area dry, photograph it and obtain repair or decorating advice | Immediately – cleaning cannot rebuild the finish |
| Speckling or a musty patch | Possible moisture or mould issue | Do not spread it with routine wiping; identify the moisture source and seek suitable advice | The source, material or safe treatment is unknown |
White vinegar, bicarbonate paste, bleach, fabric conditioner and melamine sponges are often presented as universal shortcuts. They are poor default choices for an unknown finish. Acids, alkalinity, fragrance residues and fine abrasion can change sheen, lift weak paint or expose an MDF edge. A product label and the board or paint manufacturer’s care instructions take priority over a household recipe.
Set up a simple two-cloth kit
Use a vacuum soft-brush attachment or dry duster, two clean microfibre cloths, a small bucket, a towel and protective gloves where the product label requires them. One cloth lifts soil with the tested solution. The second carries clean water for residue removal. Keeping those jobs separate makes streaks easier to prevent and shows when the wash water needs changing.
Choose white or pale cloths for the hidden test because transferred paint is easier to see. Avoid an old sponge that may contain grit from another surface. Place the bucket where it cannot be kicked onto carpet or laminate, and keep the towel ready before the first damp section is started.
Need help with your tenancy clean?
Enter your postcode to view our rates and availability in your area.

End of tenancy skirting board cleaning: the room-by-room method
Clean skirting boards after decorating, furniture removal and general dusting have finished. Complete them before the final vacuum and floor clean. Work one room at a time. This keeps the clean and unchecked sections obvious, reduces repeated bending and gives each damp section time to dry before the last inspection.
1. Clear access and protect nearby finishes
Move light furniture away from the wall and lift curtains or cables that rest against the boards. Do not drag heavy furniture across the floor for this one task. Use good lighting and check for loose cable clips, damaged sockets, peeling wallpaper and fresh paint. Keep the wet cloth away from electrical fittings and any open wall or floor joint.
2. Remove loose dust from the top down
Start with the top lip, moulded grooves and corners. A vacuum cleaner with a clean soft-brush attachment lifts dust without pushing it across the wall. Follow with a folded microfibre cloth, turning to a clean face as it loads. Pay attention to the small gap behind radiator pipes and the dust line where the board meets the floor.
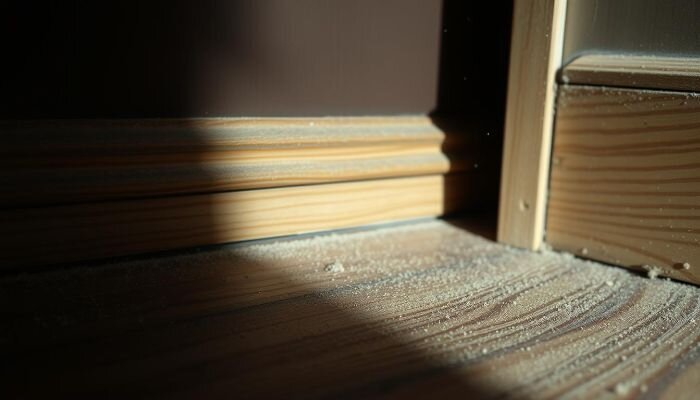
Change or empty the vacuum tool when it becomes dusty. A dirty brush can leave a dark line on pale paint. Dry removal should do most of the work on rarely touched top edges, which limits both chemical use and drying time.
3. Test the least visible sound section
Choose a small area behind a door or where furniture normally stands. Apply the proposed method with a white cloth, using the same dilution and pressure intended for the rest of the room. Let the test area dry before deciding that it is compatible. Wet paint can appear darker temporarily. Permanent dulling, colour transfer or softening is a stop signal.
4. Wipe small sections with a well-wrung cloth
Where the hidden test passes, use warm water with only a small amount of mild washing-up liquid or another cleaner approved for the finish. The cloth should feel barely damp. Wipe along the board and avoid flooding grooves, joints or the wall line. Keep a second cloth for clean water so dirty solution is not moved around the room.
Work from the cleaner part of the room towards doorways and busy edges. Change the water when it turns grey. Repeated passes with dirty water leave a film that becomes visible after drying, particularly on satin and gloss paint.
5. Treat individual marks as a separate decision
First decide whether a mark is sitting on the coating or has removed part of it. A light transferable scuff may release with the mild tested solution and a soft cloth. Increase contact time slightly before increasing pressure. Do not jump to an abrasive sponge, solvent or concentrated product. If the original colour or sheen has gone, cleaning has reached its limit.
Paint chips, dents, swollen MDF and deep scratches belong in the condition record. The wider distinction between cleanable soil and cleaning disputes matters because neutral photographs and accurate descriptions are useful evidence. Avoid trying to hide damage with an aggressive product.
You may also enjoy:

6. Remove residue, dry and inspect
Wipe away any soap residue with a second well-wrung cloth, then dry the board with a clean towel. Pay particular attention to MDF joints, cut ends, chips and the floor line. Look along the surface from the side after it has dried. Side light reveals streaks, remaining dust on the top lip and dull patches more clearly than overhead lighting.
How to clean skirting boards without repeated bending
A long-handled duster or vacuum extension can remove dry soil from open runs. For compatible, sound finishes, a flat-head microfibre tool with a firmly attached, well-wrung pad can reduce repeated kneeling. Keep the head under control so it does not strike the wall or drag grit along the paint.
Long tools are less precise at corners, behind pipes and around damaged edges. Clean those areas by hand from a stable position, or leave them for someone who can work safely. Avoid balancing on stools or pulling fixed furniture away from walls merely to reach a small hidden section.
Marks that cleaning will not repair
Cleaning changes the level of soil on a surface. It does not replace missing paint, flatten swollen fibreboard or fill a deep gouge. Old yellowing may sit within the coating rather than on it. A dark mark beside a radiator pipe can also reflect heat or previous moisture instead of removable dirt.
Photograph a defect before and after a cautious cleaning test. Stop when the surrounding finish begins to change or the mark remains and the cloth comes away clean. Repair, redecorating and replacement are separate jobs that should be agreed with the appropriate person. Do not improvise them during the final clean.
Room conditions that change the approach
Hallways and stairs: Grit, shoe marks and suitcase scuffs often collect close to corners and door frames. Vacuum carefully before touching a mark. A small grain trapped under a cloth can scratch gloss paint across a long run. Use stable access on stairs and leave any unsafe reach for suitable professional equipment.
Kitchens: Low boards near cooking and bin areas can hold a thin greasy film. A mild approved solution may need slightly more contact time, followed by a clean-water wipe. Stronger concentration is not the first answer. Grease transferred from a dirty cloth will create a broader dull patch.
Bathrooms and utility spaces: Condensation and floor splashes make joints and exposed MDF edges vulnerable. Use the least moisture and dry promptly. Swelling, bubbling or persistent speckling needs investigation beyond routine wiping. Do not cover an unresolved moisture problem with paint or stronger cleaner during the handover clean.
Bedrooms and living rooms: Dust is usually the main issue, with isolated furniture scuffs near beds, sofas and desks. Dry cleaning may complete most of the run. Inspect behind doors and along radiator walls, then record chips or dents exposed when furniture is removed.
Fit skirting boards into the final check-out sequence
Skirting boards sit low in the room, so they collect dust released from shelves, doors, radiators and window ledges. Complete higher-level dusting first. Clean the boards next, then vacuum carpet edges or finish hard floors. The full end of tenancy checklist remains the owner for the rest of the property.
- Compare the room with the check-in inventory and any dated photographs before treating a questionable mark.
- Photograph clean boards only after they are dry and the floor edge has received its final vacuum or wipe.
- Use neutral descriptions such as dust removed, scuff remained, paint chipped or MDF edge swollen.
- Capture an entire wall and a closer image so the location and condition are both clear.
- Keep invoices and communications with the wider check-out record when professional work was booked.
A structured check-out inspection also catches dust behind doors and at hallway corners, where a quick straight-on photograph can miss the top edge of the board.
When a full end of tenancy clean is the practical route
One short run of skirting board is manageable as a separate task. A furnished flat or multi-room property creates a different workload because access, dust control, floor cleaning and final checks have to be coordinated. The practical threshold arrives when the handover window is short, several finishes are involved or the same dust is moving between rooms as furniture and belongings leave.
Samyx Cleaning includes accessible skirting-board dusting and wiping within the relevant scope of an end of tenancy cleaning booking. The team can address cleanable surface soil and include the boards in the final room sequence. Paint repair, swollen MDF, specialist restoration, inaccessible areas and deposit decisions remain outside cleaning work.
The service is planned around the property described when the quote is prepared. If the condition on the day is far heavier than described, any change is discussed and agreed with the client first. The 72-hour re-clean applies only to the end-of-tenancy service and to areas noted at check-out; it is not a deposit-back promise.
Book End of Tenancy Cleaning
Enter your postcode to view our rates and availability in your area.
Frequently asked questions
-
How often do skirting boards need cleaning during a tenancy?
Dust the top edges when visible soil collects and include the boards in normal room cleaning. Before check-out, complete one dry-to-damp final pass after higher surfaces have been dusted and before the last floor clean.
-
How do you clean skirting boards without bending down?
Use a vacuum extension or long-handled duster for dry soil. A controlled flat-head microfibre tool can help on sound open runs. Corners, damaged edges and delicate finishes still need careful hand work.
-
Can cleaning make damaged skirting boards look new?
No. Cleaning can remove dust, grime and some transferable scuffs. Missing paint, deep scratches, swollen MDF, chips and discoloured coatings need a repair or decorating decision. Stronger cleaning will not rebuild them.
Important: Check the skirting-board and cleaning-product care instructions before you start, and test a hidden area. Use minimal moisture around MDF, chipped paint, joints and floor edges. Stop if the finish softens, transfers colour, dulls, swells or lifts. Cleaning can remove soil and some transferable marks. It cannot repair damaged paint, swollen board or deep scratches. Photographs and this general cleaning guidance do not determine deposit liability or replace tenancy, manufacturer or professional advice.
Author: Svetlana Georgieva (Clara)
Hi, I’m Svetlana Georgieva, but you can call me Clara. As the co-founder and heart behind Samyx Cleaning, I’m devoted to sharing the art of a clean space. Let’s journey into a cleaner, more joyful life together with tips from London's cleaning experts.

Discover more of our cleaning secrets: