
How to Remove Mould from Your Window Sills for Good

Last modified on: 01/09/2026
Publish: 28th Aug 2023
Views:
Category: Cleaning & Health
Tags:
Cleaning tips, Eco-friendly cleaning, Mould, White vinegar

Mould and condensation need different responses: find the moisture source before choosing a cleaning method.
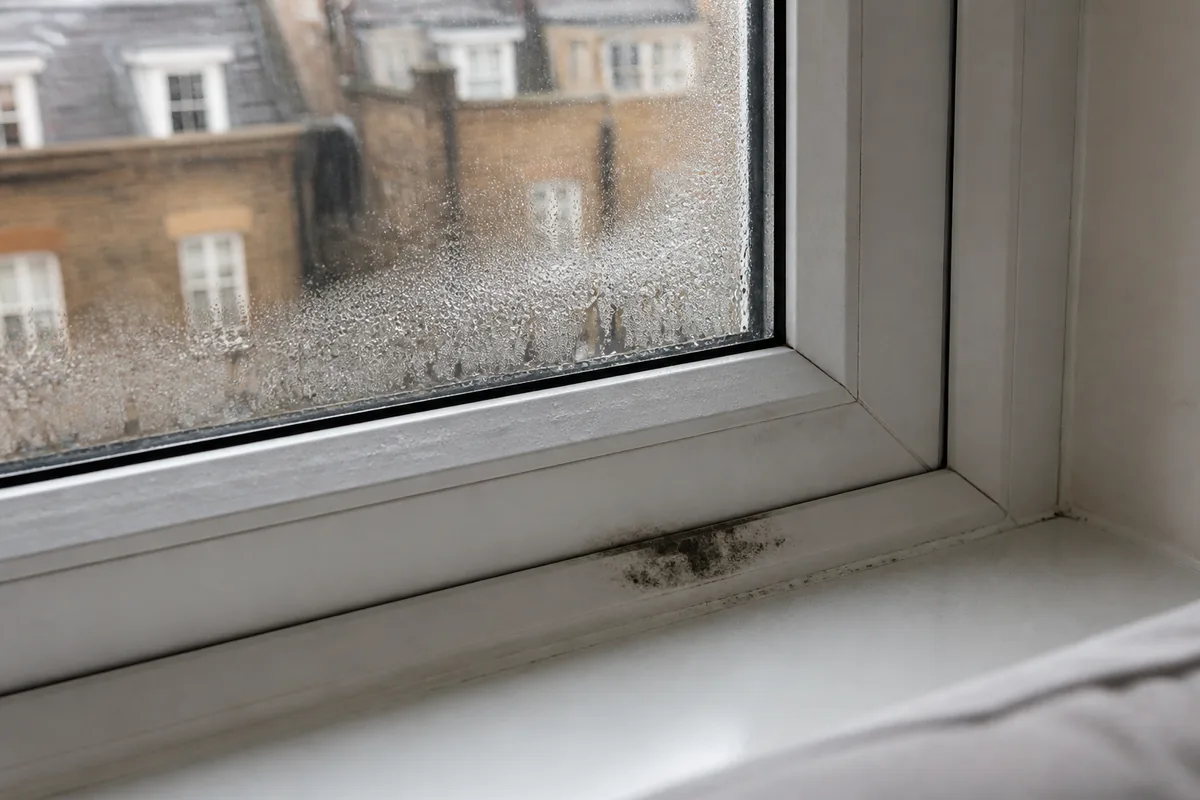
Dealing with constant condensation on your windows is more than an aesthetic inconvenience. It can pave the way for a more sinister issue – mould growth on your window sills. This problem, if left unchecked, can escalate into a serious concern that not only damages your home but also poses potential health risks for you and your family.
To effectively combat this problem, it’s crucial to understand its causes, implement a thorough cleaning regimen, and adopt preventive measures to ensure that the issue doesn’t recur.
Key takeaways
- Condensation is one possible moisture source; leaks, water ingress and building defects need a different response.
- Visible mould can return when the moisture source, cold surface or airflow problem remains.
- Bleach, vinegar and hydrogen peroxide are not interchangeable or suitable for every finish.
- Small surface patches may be manageable. Extensive, hidden, porous or recurring growth needs assessment.
- Tenants should keep dated records and report damp or mould in writing without assuming who caused it.
Table of Contents
Causes of mould on window sills
Mould is a type of fungus. It thrives in moist environments. When water finds its way onto your window sill, it creates an ideal habitat for mould to flourish. This is particularly evident in areas with high humidity levels such as bathrooms and kitchens. The underlying sources of moisture that contribute to mould growth include:
- Damaged gutters – Gutters that aren’t functioning properly can lead to water leakage, which eventually finds its way to your window sills.
- Leaking pipes – Undetected leaks in plumbing systems can gradually accumulate moisture around your windows.
- Rising damp – Capillary action can cause water to rise from the ground into your walls and window sills, providing the necessary dampness for mould to thrive.
- Condensation buildup – Windows in spaces with inadequate ventilation can easily accumulate condensation, creating a moist environment conducive to mould growth.
- Inefficient heating system – Inconsistent or inadequate heating can lead to temperature variations that contribute to condensation, providing a breeding ground for mould.
- Poor ventilation – Rooms lacking proper airflow allow moisture to accumulate, promoting the growth of mould on surfaces like window sills.
Mould and condensation: identify the moisture source first
Condensation forms when moisture in the indoor air meets a surface cold enough for water droplets to appear. A damp patch does not prove condensation, though. Its position, timing and response to ventilation help show whether the next step is household moisture control or a building check. The condensation guidance from the Centre for Sustainable Energy provides a useful UK overview.
| Visible pattern | Likely source to investigate | Immediate action | When to escalate |
|---|---|---|---|
| Droplets on cold glass or frames, often after cooking, showering or overnight | Condensation from humid indoor air meeting a cold surface | Dry the surface, use working extractors or trickle vents and reduce avoidable moisture | If it persists despite reasonable ventilation and heating, or the room cannot be ventilated safely |
| A local wet patch, staining around a frame or damp after rain | Window seal, roof, gutter, pipe or penetrating-water problem | Record the pattern and avoid decorating over it | Arrange a landlord, maintenance or building-professional inspection |
| Moisture and damage concentrated low on a wall | A damp problem that should not be diagnosed from appearance alone | Keep a dated record and protect belongings from the wet area | Seek a qualified building assessment before repeated cleaning |
| Growth that returns quickly, extends behind furniture or affects damaged porous material | Unresolved moisture or hidden contamination | Stop disturbing the area and restrict access where practical | Use a landlord, building professional or specialist mould assessor |
Cooking, washing and drying clothes all add moisture to indoor air. Resident behaviour should not be assumed to explain every damp or mould problem. Cold bridges, defective ventilation, leaks and disrepair can produce similar symptoms. Treat the table as a decision aid, not a diagnosis.
You may also enjoy:

Plan a One-Off Home Clean
Enter your postcode to view our rates and availability in your area.

Effective cleaning supplies
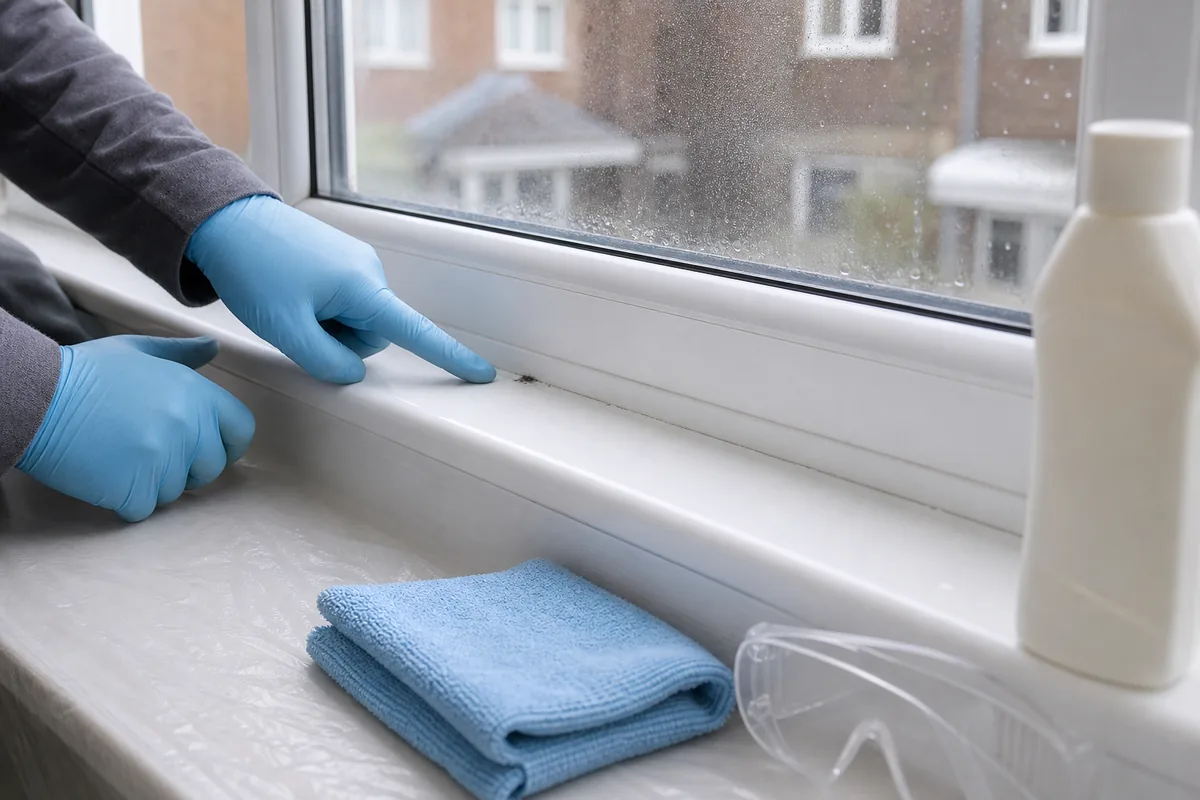
When it comes to tackling mould on window sills, having the right tools and cleaning agents is essential. Here’s what you’ll need:
- Gloves – Protect your hands from the cleaning agents and potential mould spores with a good pair of gloves.
- Bleach – An effective mould remover, bleach can help eliminate mould stains from window sills. You can use white vinegar if you prefer a more natural alternative.
- Rag – A cloth rag will aid in wiping away mould particles and excess cleaning solution.
- Brush – Use a stiff brush to scrub away stubborn mould growth from the surface.
- Plastic tarp – To catch any cleaning solution or mould particles and avoid making a mess.
- Garbage bag – Dispose of the used cleaning materials safely and hygienically.
Depending on the severity of the mould problem and the type of sills you have, additional safety gear might be required. Rubber gloves, goggles, and a face mask can provide extra protection against harsh cleaning agents and mould spores. However, if your window sills are made of wood, you might also need:
- Goggles – Shield your eyes from any potential debris or cleaning solution splatters. Especially important if you’re using chemicals.
- Dust mask – Prevent inhalation of dust particles and mould spores while sanding.
- Sandpaper – If the sills are wooden, sandpaper is essential to remove mould stains.
- Paint and paintbrush – Restoring the appearance of wooden sills might require repainting.
Choose a product for the surface
The product label and the window manufacturer’s care instructions take priority over a household recipe. Check whether the affected area is sound uPVC, coated metal, painted timber, bare wood, sealant or another finish. A hidden-area patch test can reveal colour or coating changes before the visible sill is treated.
| Option | What it may do | Limits and cautions |
|---|---|---|
| Labelled mould remover | Offers product-specific instructions for a stated surface and contact time | Confirm material compatibility, ventilation, protective equipment, rinsing and drying on the label |
| Bleach or chlorine product | May lighten some visible surface staining | It is not a moisture fix and may affect finishes; never mix it with vinegar, acids, ammonia, peroxide or another cleaner |
| White vinegar | May be used on some compatible household surfaces | Evidence and compatibility vary; acid can harm stone, coatings, metals and seals, and it must never be combined with bleach |
| Labelled 3% household hydrogen peroxide | Sometimes used on a small compatible non-porous area | Do not use a stronger concentration or create a mixture; follow its label and keep it away from bleach, vinegar and other cleaners |
Step-by-step process to remove mould from your window sills
Here’s a step-by-process you can follow to deal with this pesky problem:
- Safety first – Before you begin, put on your gloves, goggles, and face mask to protect yourself from the cleaning agents.
- Prepare the area – After that, lay down a plastic tarp to catch any drips or debris during the cleaning process. This will make the cleanup easier.
- Ensure ventilation – Open the windows in the affected area to allow fresh air to circulate. Proper ventilation is essential for dispersing mould spores and any lingering fumes from cleaning solutions.
- Mix the cleaning solution – Dilute one part bleach in three parts lukewarm water to create a cleaning solution. Bleach is an effective mould-killer, but using it at full strength can damage surfaces. If you’re using vinegar, you don’t need a solution unless you’re treating wooden window sills. In that case, dilute the vinegar with water and add some olive oil to prevent it from ruining the wood.
- Scrub away mould – Dip the brush into the cleaning solution and vigorously scrub away the mould from the window sill. Use firm, circular motions to loosen the mould.
- Wipe clean – After scrubbing, use a rag to wipe away the loosened mould particles and excess cleaning solution. Dispose of the used rag properly.
- Allow to dry – Let the window sill air dry completely before closing the window. This step is crucial to prevent any residual moisture that could lead to further mould growth.
- For wooden sills – If the window sill is made of wood and mould stains persist, use sandpaper to gently sand away the remaining stains. Vacuum the area to remove any sawdust. You can treat the window sills with an antimicrobial coating.
- Final wipe down – Use a clean, damp rag to give the window sill a final wipe down, ensuring that all traces of mould and cleaning solution are gone.
- Clean up – Remove the plastic tarp and carefully gather any debris or used materials. Dispose of them in a garbage bag and seal it properly for disposal.
Current care limits
The sequence above records the original window-sill treatment. The fixed one-to-three bleach dilution is not a universal instruction. Formulas, labels and surface finishes differ. The vinegar and olive-oil method should not be assumed suitable for timber, and a labelled product must never be mixed with a second cleaner.
Avoid dry brushing, vigorous disturbance or sanding as routine DIY treatment for visible mould. Those actions can spread particles, remove a protective coating or expose damaged material. Stop if the finish changes colour, becomes dull, softens, lifts or reveals deeper growth. Ask the window manufacturer, landlord or an appropriate specialist about damaged wood and unknown coatings.
As you near the finish line, there may be a lingering damp smell dancing between the vinegar or bleach, but it’s easy to deal with.
When mould is not a DIY cleaning job
Repeated wiping is the wrong response when the surface is only showing a deeper moisture problem. Pause the cleaning and arrange an assessment when any of these conditions applies:
- The growth covers a large area, appears in several rooms or returns soon after cleaning.
- The mould is behind fixed furniture, inside a wall or window assembly, or on damaged plaster, insulation, carpet or timber.
- A leak, rainwater entry, defective gutter, plumbing fault or structural damp pattern is suspected.
- The window coating or seal has failed, the timber is soft, or the material is valuable or unknown.
- A resident has breathing symptoms, a mould sensitivity or another health concern that makes disturbance unsuitable.
Preventing a window sill mould encore
Mould removal is only half the battle; prevention is key to keeping your window sills mould-free. Implement these strategies to prevent mould from making a comeback:
- Improve ventilation – Ensure proper airflow by using exhaust fans in bathrooms and kitchens. Opening windows for a few minutes each day can also help maintain optimal ventilation.
- Dehumidification – Consider using a dehumidifier in rooms prone to high humidity to reduce moisture levels.
- Houseplant placement – Keep houseplants away from windowsills, as they can release moisture and contribute to dampness. You’re watering your plants regularly, right?
- Daily ventilation – Open windows and curtains for a short period every day to allow fresh air to circulate and combat moisture buildup. As much as we can call London air “fresh”.
- Seal leaks – Regularly check for leaks in gutters, pipes, and windows. Promptly repair any issues to prevent water infiltration.
Rented homes: record and report the pattern
Take dated photographs of the mould, condensation and any related staining before cleaning. Note when droplets appear, which rooms are affected, whether extractors and heating are working, and whether the patch changes after rain. Send the record to the landlord or managing agent in writing and retain a copy.
Do not accept or assign blame from appearance alone. The GOV.UK damp and mould guidance tells housing providers to identify and address the underlying causes. Responsibilities and next steps depend on the cause, the tenancy and the condition of the building, so obtain housing advice for a disputed or unresolved case.
When a planned home clean can help
Routine domestic cleaning belongs after the moisture source has been identified and the affected surfaces are suitable for normal cleaning. Samyx Cleaning can include accessible sound surfaces within a planned one-off cleaning visit in London, alongside the wider room clean.
This service does not replace a damp survey, leak repair, building work or specialist mould remediation. Tell the office about the affected area before booking so the team can confirm whether the requested cleaning is within scope.
Book One-Off Cleaning
Enter your postcode to view our rates and availability in your area.
Conclusion
By following this comprehensive guide, you can effectively remove mould from your window sills and take proactive steps to prevent its return. This process ensures a healthier living environment and preserves the integrity of your home. And, as always, if you need us, we’re never more than a phone call away.
Frequently asked questions
-
How can you tell if mould is caused by condensation?
Condensation is more likely when fresh droplets appear on cold glass, frames or external walls after cooking, showering, drying clothes or sleeping. That pattern is a clue, not proof. Local staining after rain, a persistent wet patch or damage around a pipe or frame needs a leak or building check.
-
Should you wipe condensation off windows and walls?
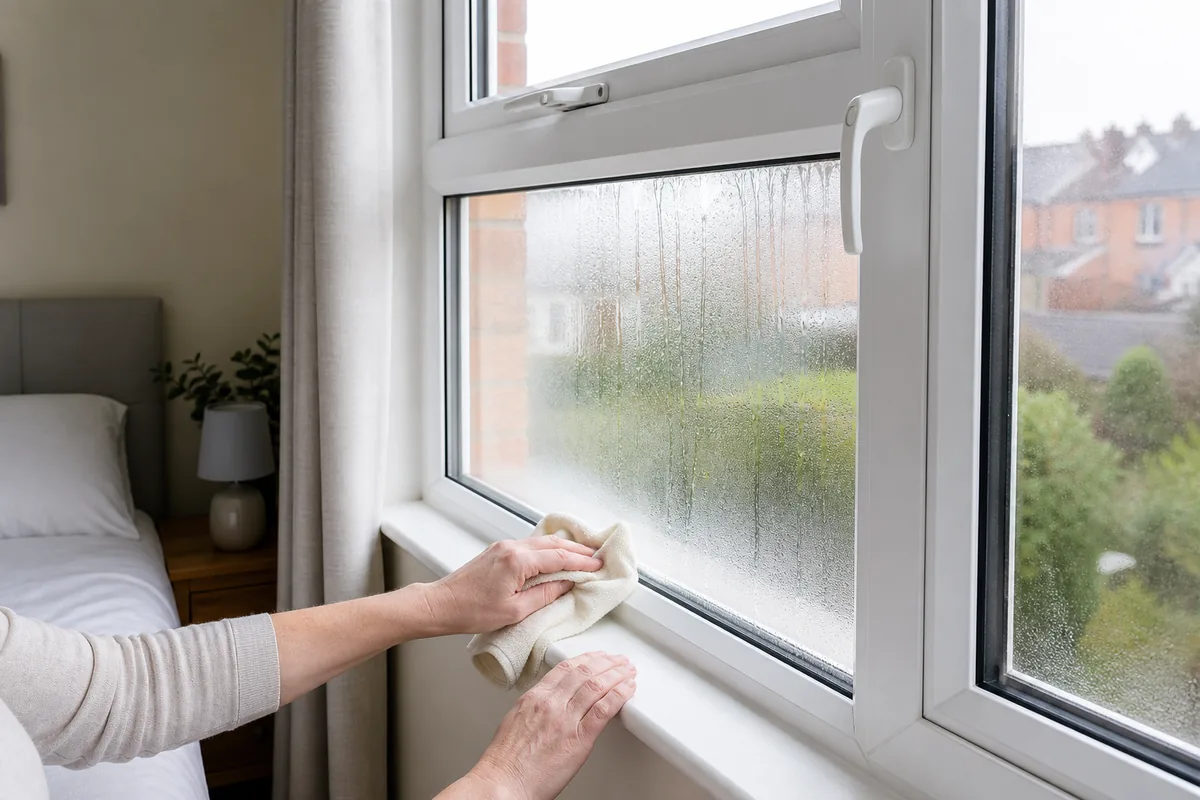
Remove standing droplets with a clean absorbent cloth and dry the surface, then wash and dry the cloth. Wiping reduces the time a surface stays wet; it does not correct a leak, cold bridge, failed ventilation or another source of moisture.
-
Does having the heating on help with damp and mould?
Suitable background warmth may raise surface temperatures and reduce condensation on some cold areas. Heating alone cannot repair water ingress or remove excess indoor moisture, so ventilation, moisture control and any building defect still need attention.
-
Can white vinegar clean mould?
White vinegar may affect visible growth on some compatible household surfaces; it is not a universal mould treatment or a moisture fix. Check the material and manufacturer guidance, test discreetly and never mix vinegar with bleach or another cleaner.
-
When should you avoid cleaning mould yourself?
Avoid DIY disturbance when growth is extensive, recurrent, hidden, on damaged porous material or linked to an active leak. Stop as well when the material is unknown or valuable, or a resident has symptoms or a health sensitivity. Report or arrange an appropriate assessment first.
Important: Follow the cleaning-product label and the window or finish manufacturer’s care instructions over general guidance. Patch-test a hidden area when compatibility is uncertain. Use the stated protective equipment, ventilation, rinsing and drying steps. Never mix cleaning products, especially bleach or chlorine products with vinegar, acids, ammonia or hydrogen peroxide. Stop if a surface discolours, dulls, etches, softens, lifts or sheds material. Delicate, valuable, unknown, porous or damaged finishes need manufacturer or professional advice first. Leave the area and seek NHS or GP advice if exposure is followed by breathing trouble or other concerning symptoms. In a rented home, keep dated records and report recurring damp or mould in writing.

Author: Atanas Dzhingarov
Hi, I’m Atanas - brand consultant and writer. I’m helping Samyx Cleaning create the best cleaning company blog on the Internet. Join us on our journey and learn how to live a cleaner, healthier, happier life in the process.
Discover more of our cleaning secrets: