
How to Remove Chocolate Stains from Clothes and Fabrics

Last modified on: 01/09/2026
Publish: 18th Dec 2023
Views:
Category: DIY
Tags:
Baking soda, Cleaning tips, Eco-friendly cleaning, White vinegar

How to get chocolate stain out of clothes depends on the care label, the fabric and whether the mark is fresh, dried or already heat-set.
The Holiday season is upon us. This means cold weather, smoking chimneys, holiday shopping, and, of course – lots of chocolate. Unfortunately, chocolate does bring a sweet set of problems – chocolate stains!
Chocolate stains on clothing and fabrics can be a nightmare to remove. They’re much more complex than most people realise. This complexity arises from the fusion of protein-based elements like milk and cream, with oil-based components, such as cocoa butter. This blend requires a detailed approach if you want to remove these chocolate stains for good.
Key takeaways
- Check the label first: fabric construction and care instructions decide which treatment is safe.
- Lift instead of rubbing: remove solid chocolate before adding water or cleaner.
- Work from the reverse: on a washable item, cool water can help push residue towards the side it entered.
- Treat the whole stain: chocolate may contain fat, protein, sugar and pigment, so one quick rinse may not finish the job.
- Delay heat: inspect the fabric after washing and repeat a compatible treatment only while the mark is still improving.
Table of Contents
How to get chocolate stain out of clothes: start with the item
The same brown mark can require different handling on a cotton T-shirt, a silk blouse, a white school shirt or a sofa. Use this first decision to avoid turning a removable stain into colour loss, a water ring or fibre damage.
| Item or stain state | Safer starting point | What changes |
|---|---|---|
| Washable colourfast clothing | Lift solids, reverse-rinse if permitted, then pretreat | Follow the garment and product labels for water temperature and washing |
| White clothing | Remove fat and food residue first | White does not automatically mean chlorine bleach or peroxide is safe |
| Silk, wool, embellished or dry-clean-only fabric | Lift loose material without spreading it | Stop before wet treatment and follow the label or use a garment-care specialist |
| Chocolate ice cream | Blot liquid and lift solids | Treat it as a mixed dairy, fat, sugar and pigment stain |
| Carpet or upholstery | Lift, blot and control moisture | Do not copy a machine-wash method onto fixed fabric |
Understanding chocolate stains
These stains are complex due to their dual composition – a mix of protein and oil. Milk chocolate’s dairy content differs in treatment needs from the oil-rich cocoa butter. Hence, removing chocolate stains usually involves a series of steps. Unfortunately, you can’t simply slap the stain with a mop until it goes away.
The significance of immediate action
A crucial aspect of dealing with chocolate stains is to act quickly. The longer a stain remains, the more it integrates into the fabric, making removal progressively more difficult. Addressing fresh stains is a lot easier than tackling those that have dried and settled in like it’s their new home.
Types of chocolate stains
Different chocolate varieties (like dark, milk, or white chocolate) might need different approaches based on their specific make-up.
For instance, dark chocolate is usually higher in cocoa and lower in milk. This means it’s generally simpler to remove than the fattier milk chocolate.
On the other hand, white chocolate doesn’t contain cocoa solids, so the staining comes mostly from the milk and sugar. Understanding these subtle differences is important if you want to tackle these stains swiftly and efficiently.
Chocolate ice cream needs an extra branch. Its melted liquid can spread beyond the visible brown area, while dairy and added fats leave residue after the pigment fades. Blot the liquid, lift any solids and use only a treatment permitted by the item’s care label.
Influencing factors in stain
Several elements can affect how well a stain is removed:
- Fabric type: Delicate materials might need milder handling compared to more robust fabrics like cotton or synthetic fibers. This might make it more difficult to handle the stains.
- Age of the stain: Newer stains are simpler to manage than older, ingrained ones.
- Chocolate variety: The type of chocolate can alter the approach to stain removal.
- Care instructions: Always consult the fabric’s washing guidelines before attempting to remove any stains.
The care label has priority over a generic stain-removal method. Also check colourfastness, trims, prints, coatings and whether a fixed textile has a backing that should not be saturated.
You probably already knew removing chocolate stains wasn’t as easy as pie, but I bet you never thought it would be so complex. Don’t fret about it – complex or not, we’re here to deal with this problem. But first, we need to prepare.
Tools and materials for removing chocolate stains from clothes and fabrics
First things first, let’s gear up. Having the right tools at your disposal is half the battle. Here’s what you need:
- Vacuum or a spoon – if the chocolate is dried, a vacuum with a small attachment is your best bet. A spoon can also work wonders, gently scraping off the excess without damaging the fabric.
- Ice cube – this little trick is a game-changer. Hardening the chocolate makes it much easier to remove without smearing.
- Clean cloth – opt for a white or light-colored cloth to avoid any color transfer while blotting. Prepare to have it ruined in the process, though. I’ve thrown out more than my fair share.
- Stain remover – this is your main fighter. Choose a stain remover suitable for the fabric type. For tougher stains, consider enzyme-based removers which are great at breaking down protein-based stains.
- Toothbrush (optional) – a soft-bristled toothbrush can help work the stain remover into the fabric. It’s especially useful for textured materials.
- Dish soap – a surprising hero in this battle, dish soap is effective due to its grease-fighting properties.
For the more challenging stains:
- Vinegar and baking soda – this famous duo can tackle tougher stains. Vinegar breaks down the stain while baking soda absorbs grease and odours. Just know that mixing them in most cases isn’t as effective as most people think.
- Hydrogen peroxide – ideal for lighter fabrics but do a spot test first. It’s a mild bleaching agent that can help lift the stain. But it can also ruin the colours or some fabrics.
- Heavy cream – for old stains, the fat in heavy cream can help dissolve the chocolate’s fat, easing its removal. This is last throw of a dice, so don’t put too much hope into it.
- Laundry Detergent: Apply it directly to the stain as a pre-treater. It’s particularly effective on fresh stains.
Note: Always start by checking the fabric’s care label to avoid any mishaps.
Compatibility limits for the tools above
A spoon is usually easier to control than a vacuum on loose or snag-prone clothing. Use ice only in a controlled way and stop if moisture, dye movement or rubbing could spread the mark. Choose a white cloth, because a light-coloured cloth can still transfer dye. Even a soft toothbrush can abrade delicate fibres, and washing-up liquid is not automatically suitable for every garment.
Vinegar and bicarbonate of soda are not a universal first choice and should not be layered with other cleaners. Hydrogen peroxide or bleach belongs only on a treatment route allowed by both the garment label and the product label. Heavy cream adds more fat and is not a dependable stain remover. A compatible laundry detergent or labelled fabric stain remover is the clearer starting point for most washable clothes.
Step-by-step guide to removing chocolate stains
Now, let’s get down to business. Here’s a step-by-step process showing you how to clean chocolate stains:
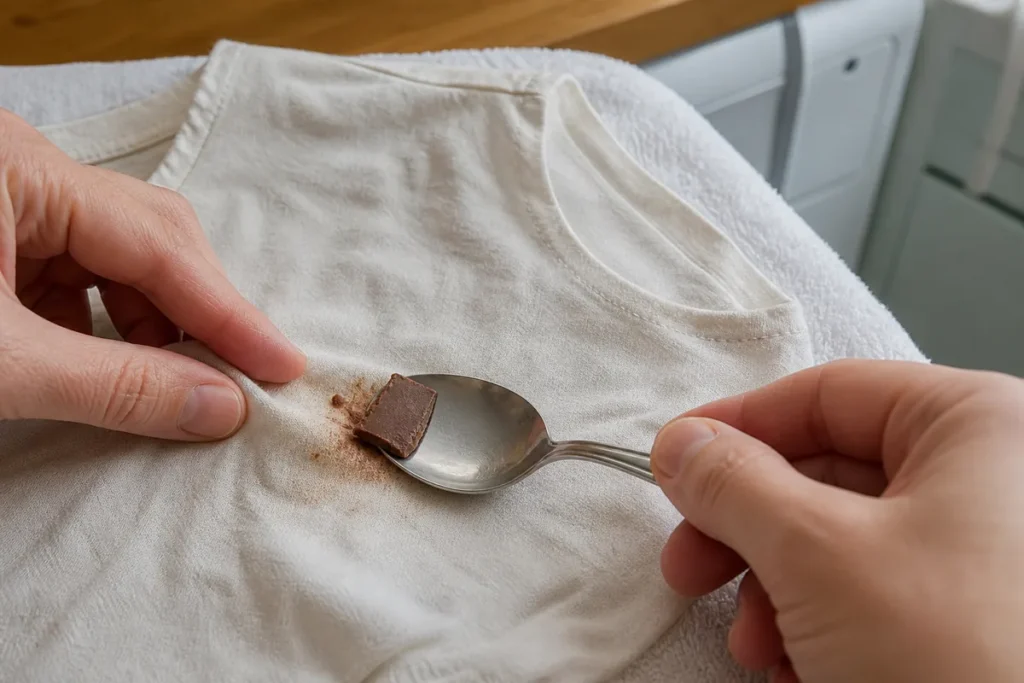
Step 1: Scrape off the excess chocolate. Carefully remove any excess. This prevents the stain from spreading during the cleaning process.
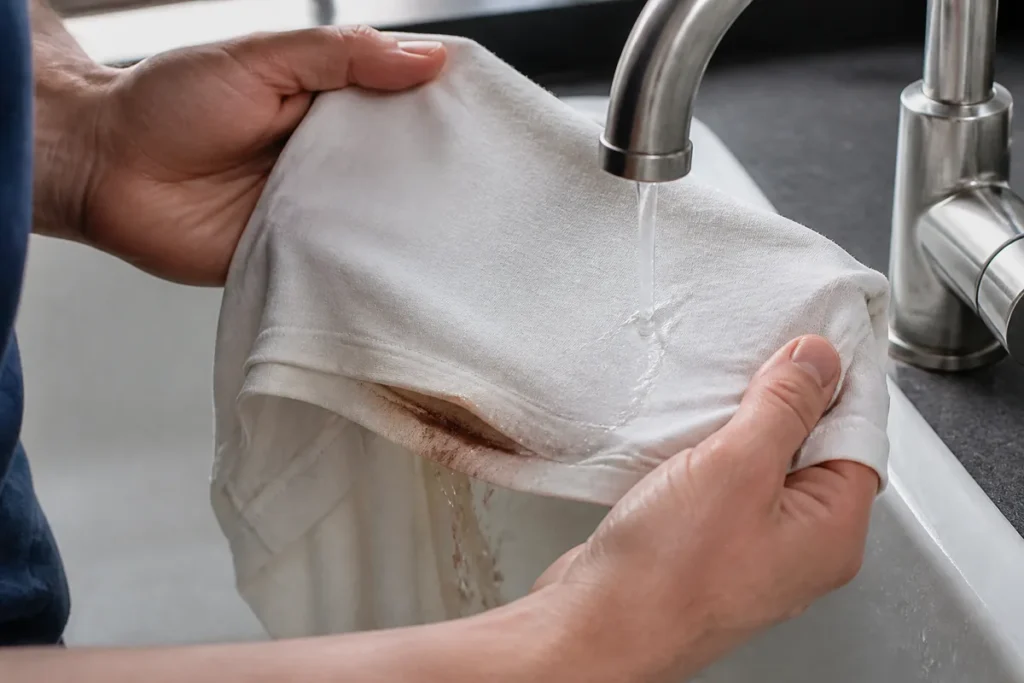
Step 2: Cold water rinse. Rinse the stained area with cold water from the back. This helps push the chocolate out of the fibers.
Step 3: Choose your method:
- Dishwashing soap and water. Mix a bit of dish soap with warm water. Apply it to the stain, blot gently, then rinse with cold water. Repeat if necessary.
- White vinegar and baking soda. Apply a vinegar-water solution to the stain and sprinkle baking soda on top. Then gently rub the soda and let it sit. After about 30 minutes, spray it with the vinegar-water solution again, then rinse it off. If you don’t like the smell of vinegar, you can create scented vinegar at home.
- Hydrogen peroxide. It’s particularly good for light-coloured fabrics but not so much for colour-preservation. Apply it directly to the stain, then blot and rinse. Always do a patch test first.
- Commercial stain removers. Read the label and apply according to the instructions. Use a toothbrush to gently work it in, then rinse. Some removers are designed for specific types of fabric, so choose accordingly.
- Heavy cream for old stains. Apply heavy cream and let it sit for a few minutes. Prepare a cup of tea in the mean time (at this point, you’ve earned it). After that, simply rinse. Follow up with another cleaning method if necessary.
After treatment, allow the garment to air dry and check for any remaining stains. If the stain persists, repeat the process.
A current label-led sequence
- Check the garment label, colourfastness and any special finish before wetting the area.
- Lift solid chocolate with a spoon, moving from the edge towards the centre without rubbing.
- Place the stained face over a clean white towel. If the label allows rinsing, pass cool water through the reverse so loosened residue moves out rather than deeper into the fabric.
- Apply a compatible laundry detergent or stain remover exactly as its label directs. Blot or work it gently only if the fabric can tolerate that action.
- Wash at the temperature and cycle stated on the care label. Air-dry, inspect in good light and repeat the same compatible route only if the stain is improving.
How to treat an old, washed or dried chocolate stain
First decide what remains. A greasy feel suggests fat residue, a stiff patch may still contain sugar or product, and a brown shadow may be pigment. A lighter patch with no residue may be dye loss rather than chocolate, so more stain remover will not restore the original colour.
Lift any dry material, then repeat a label-compatible pretreatment with fresh white towels beneath the stain. Do not jump between vinegar, peroxide, bleach and other cleaners. If the item has already been tumble dried or ironed, recovery may be limited. Stop when there is no progress or the fibre or colour begins to change.
How to remove chocolate stains from white clothes
Remove the chocolate and fatty residue before considering a whitening product. White garments can contain coloured stitching, prints, elastane or finishes that react badly to peroxide or bleach. Use an oxygen-based or chlorine product only when its label and the garment label both permit it, and never combine it with another cleaner.
You may also enjoy:

Removing chocolate stains from carpets and upholstery
Carpets and upholstery require a gentler touch and different techniques:
Chocolate stains on carpets
- Scrape the stain – use a dull knife or spoon to remove as much chocolate as possible.
- Vacuuming – a vacuum cleaner is perfect for picking up any remaining particles.
- Stain Removal Solution – a mix of mild liquid dish detergent and water works well. Apply it with a cloth, dabbing gently.
- Blotting and Rinsing – use a dry cloth to blot the stain, then a damp cloth to remove any soap residue.
- Air Drying – let the carpet dry completely to prevent any mildew growth.
Chocolate stains on upholstery
- Initial Steps – gently scrape off the excess chocolate.
- Cold water blotting – use a damp cloth to loosen the chocolate from the fibers.
- Cleaning Solution – apply a mild detergent solution, dab gently, then rinse with a damp cloth.
- Rinse and Dry – blot the area with a dry towel after cleaning.
- Delicate Upholstery – for sensitive fabrics, consider consulting a professional cleaner.
Remember, avoid heat and always test your cleaning solutions on a small, hidden area first.
For fixed textiles, check the care code, fibre and backing before adding moisture. Blot without spreading, keep the filling or carpet backing from becoming saturated and remove cleaner residue with controlled damp blotting. Allow the area to dry fully. Stop if colour transfers, the pile distorts or a water ring develops.
When a chocolate stain on carpet needs professional extraction
A large spill, a stain that has reached the backing or repeated home treatment can leave detergent and fatty residue behind. Samyx provides carpet cleaning in London, subject to fibre, construction and stain assessment. We do not promise that every old or chemically altered mark can be removed.
Ask About a Carpet Stain
Enter your postcode to view our rates and availability in your area.

Frequently asked questions about chocolate stains
Let’s address some common questions:
- Should I use cold or hot water? Start with cold water. Hot water can set the stain.
- How do I handle delicate fabrics? Use a gentle touch with mild detergent. When in doubt, professional cleaning is the safest route.
- Can I use bleach? Bleach is effective on white fabrics but can be harsh on colours. It can also be dangerous if mixed with other chemicals. I’d advise against it but if you’re set on trying it out, always dilute and test it first. And take precautions.
- Are there natural cleaning products I can use? Sure! That’s what I usually recommend, anyway. Vinegar and baking soda are great natural alternatives, especially for lighter stains.
- What can I do about persistent stains? If a stain resists initial treatment, repeat the process or try a different method. Persistent or old stains might require professional attention.
Current limits: For delicate or dry-clean-only clothing, use a garment-care specialist rather than a domestic cleaner. Natural does not mean fabric-compatible. Use bleach only when both labels allow it, never mix it with acids or ammonia, and do not switch between remedies without rinsing and reassessing. Repeat a treatment only while the stain is improving and the material remains unchanged.
Fresh, dried and ice-cream stain questions
Are chocolate stains permanent?
Not always. Fresh chocolate often responds to careful lifting, a compatible pretreatment and washing. A heat-set stain, dye loss or damage caused by earlier products may not be fully reversible.
How do you remove chocolate ice cream from clothes?
Blot the melted liquid, lift solid chocolate and treat the area as a mixed dairy, fat, sugar and pigment stain. Follow the care label, pretreat with a compatible laundry product and inspect before using heat.
Can you remove chocolate stains after washing and drying?
Sometimes, but tumble-dryer or iron heat can make residue harder to remove. Reassess the mark, repeat one compatible treatment if it is improving and stop if the colour or fibre changes.
Does vinegar remove chocolate stains?
Vinegar is not a universal chocolate-stain remover and may be unsuitable for some dyes, fibres and finishes. A labelled laundry detergent or fabric stain remover is usually a clearer starting point for washable clothing.
Important: This is general household stain-care guidance. Follow the garment, upholstery and product labels, test in a hidden area and do not mix cleaning products. Never combine bleach with acids or ammonia. Avoid heat until the stain is gone, and stop if colour transfers, fibres distort or the material changes. Valuable, delicate and dry-clean-only items belong with a suitable specialist.
Conclusion
There you have it – a detailed guide to conquering those chocolate stains. With the right tools, techniques, and a bit of patience, you can restore your clothes, carpets, and upholstery to their former glory. Remember, the key to success is acting quickly and choosing the right method for your specific situation. Happy cleaning, and here’s to enjoying your chocolate worry-free. And, as always, if you need us, we’re never more than a phone call away.

Author: Atanas Dzhingarov
Hi, I’m Atanas - brand consultant and writer. I’m helping Samyx Cleaning create the best cleaning company blog on the Internet. Join us on our journey and learn how to live a cleaner, healthier, happier life in the process.
Discover more of our cleaning secrets: