
Restoring Tarnished Brass in Your London Home

Last modified on: 02/09/2026
Publish: 19th Feb 2024
Views:
Category: DIY
Tags:
Cleaning brass, Cleaning tips, Eco-friendly cleaning

A homemade brass cleaner is safe only when it suits the item, because solid unlacquered brass, brass plate, lacquer, deliberate patina and antiques need different care.
Identify the surface before making the cleaner
- Check whether the item is solid brass, brass-plated, lacquered, deliberately patinated, antique, valuable or joined to another material.
- For an ordinary modern item that is safe to wet, begin with a soft cloth and mild washing-up liquid in warm water. Rinse away residue and dry it immediately.
- Do not use acidic or abrasive recipes on plate, lacquer, antiques, intentional patina or an unknown finish. A magnet can reveal some steel cores, but a non-magnetic result does not prove solid brass.
- If you try a tarnish method on confirmed plain, unlacquered brass, test a hidden area, keep contact brief and stop if the surface turns pink, coppery, patchy or scratched.
Ever glanced at your brass fixtures and felt they looked a bit…under the weather? That’s what tarnished brass looks like. Brass tarnish is a common issue, especially in a bustling city like London. Humidity and pollution can speed up the process and turn the once shiny metal into a tarnished mess.
But what exactly is tarnish, and how can you tell it’s time to roll up your sleeves? We’ll delve into the causes of brass tarnish, how to clean heavily corroded brass, and how to restore its shine. Whether it’s that cherished antique or your everyday hardware, we’ve got you covered!
Key takeaways
- The safest first cleaner for an ordinary washable brass item is mild washing-up liquid and water, not an acidic polish.
- A magnet may reveal a steel core beneath brass plating, but it cannot confirm that a non-magnetic item is solid brass.
- Vinegar, lemon, ketchup, salt, toothpaste and commercial polish can affect brass, plating, lacquer or deliberate patina in different ways.
- Acid-and-salt recipes need especially cautious use because residues and prolonged contact can change the alloy and leave a pink or coppery surface.
- Antiques, heirlooms, valuable pieces, musical instruments and unknown finishes need object-specific advice rather than a universal home recipe.
Table of Contents
Understanding brass tarnish
So, what’s brass tarnish? Brass tarnish is a chemical reaction that occurs when brass (an alloy of copper and zinc) is exposed to air and moisture. You’ll know if this reaction has occurred because when it does, brass becomes dull and discolored.
Material note: dirt removal and polishing are not the same job. The Canadian Conservation Institute explains that polishing is abrasive: it removes tarnish and some surface metal. Repeated polishing can therefore soften detail even when the brass looks brighter afterwards.
Brass items in London often get a tarnish ticket faster than you can say ‘fish and chips’. The city’s unique mix of high humidity and urban pollution can accelerate the tarnishing process but fear not, it’s reversible!
Signs your brass needs attention
Wondering if your brass is crying for help? Here are some common signs that it is:
- Dullness and discoloration – the once bright and shiny surface turns dull and loses its golden hue. It often appears brownish or gray.
- Greenish-black spots – these are tell-tale signs of advanced tarnish. It’s often the result of prolonged exposure to moisture or corrosive substances.
- Uneven texture – the smooth surface of brass may feel uneven or gritty. This is an indication that tarnish has started to eat away at the metal.
If your items have lost their mojo and look like they’ve seen better days, it may be time to clean your badly tarnished brass.
Choose a homemade brass cleaner by material and finish
Colour alone cannot tell you exactly what the object is or which layers are present. Use this table as a stop-or-proceed check, then follow the maker’s care instructions where they exist.
| Item or surface | What changes the decision | Safer next step |
|---|---|---|
| Plain modern solid brass | No lacquer, plating, deliberate patina, valuable detail or attached vulnerable material | Start with mild soapy water. If tarnish remains, test the least aggressive compatible treatment in a hidden spot. |
| Brass-plated item | The brass layer may be thin or already worn at edges and touch points | Avoid abrasive paste and vigorous rubbing. Use the maker’s instructions or specialist advice. |
| Lacquered brass | The clear coating, not the metal beneath it, is the surface being cleaned | Use only the coating-safe method specified by the maker. Do not use vinegar, lemon, salt or polish by default. |
| Antique, heirloom or valuable brass | Patina, lacquer and signs of age may form part of its history and value | Remove loose dust only and ask a qualified metal conservator before polishing. |
| Mixed-material object | Wood, felt, paint, glue, leather, stone, wiring or internal parts may react differently | Do not soak it. Protect the other materials and seek object-specific advice. |
| Unknown brass-coloured surface | A magnetic core can indicate plated steel, but a non-magnetic result is not proof of solid brass | Treat the finish as vulnerable until its construction is confirmed. |
Preparing to clean your tarnished brass
You know I’m going to say it, so here it is – victory loves preparation. So before we get to how to clean your badly tarnished brass part, we first need to prepare properly.
Identifying the type of brass
First and foremost, you need to identify the type of brass you’re dealing with. I know, I know – metallurgy is hardly most Londoners’ favourite hobby but bear with me.
It’s important to make some considerations before you start cleaning. Otherwise, you may end up ruining your brass instead of returning it to its former glory.
Lacquered or unlacquered?
This is the first question you need to answer. Lacquered brass has a protective coating which you can strip off if with vigorous scrubbing or acidic cleaners (like the vinegar or lemons we suggest below). Unlacquered brass has no such coating.
Brass plating
Is your brass item even brass? It’s entirely possible that it’s brass-plated, meaning the item is not solid brass but brass over another metal.
If that’s the case, you can strip off the brass plating. A simple magnet can help you determine whether that’s the case or not – if the magnet sticks, it’s not brass.
Identification limit: a magnet that sticks may reveal iron or steel beneath a brass-coloured surface. A magnet that does not stick does not prove solid brass, so do not use an acid or abrasive recipe on that result alone.
Antiques and heirloom
As with all other cleaning methods, the ones below carry a degree of risk. So I don’t recommend using them on family heirlooms or antiques – that’s best handled by the professionals.

What you’ll need
- Basic supplies: Gather eco-friendly cleaning agents like white vinegar, salt, flour, and mild soap. For tougher jobs, lemon, baking soda, and toothpaste can be handy.
- Safety gear: Don protective gloves and perhaps goggles if you’re sensitive to cleaning agents. Working in a well-ventilated area is also crucial to avoid inhaling fumes.
- Preparation area: Choose a spot with good lighting and ventilation. Cover the surface with old newspapers or a cloth to protect against spills and drips.
Compatibility warning: household availability and an eco-friendly label do not prove that an ingredient suits every brass surface. Keep each product in its original container until use, do not mix a homemade recipe with another cleaner, and exclude acids and abrasives when the finish is lacquered, plated, valuable or unknown.
Setting up your cleaning area
- Space selection: Opt for a stable, flat surface in a well-lit room. Avoid areas with direct sunlight to prevent quick drying of cleaning pastes.
- Surface protection: Use plastic sheets or old towels to safeguard your countertops or tables from potential damage by acidic cleaning agents.
- Ventilation: Ensure the room is well-ventilated to dissipate fumes from vinegar or other cleaning solutions, preventing any discomfort during the cleaning process.
Step-by-step guide to cleaning tarnished brass
Here are several brass cleaning methods you can try step-by-step.
Before the recipes: use the methods below only after the object and finish have been checked. Begin with soap and water where compatible. For confirmed plain, modern, unlacquered brass, patch-test any stronger method, keep the contact time as short as the result allows, rinse away every residue and dry at once.
Vinegar, salt, and flour
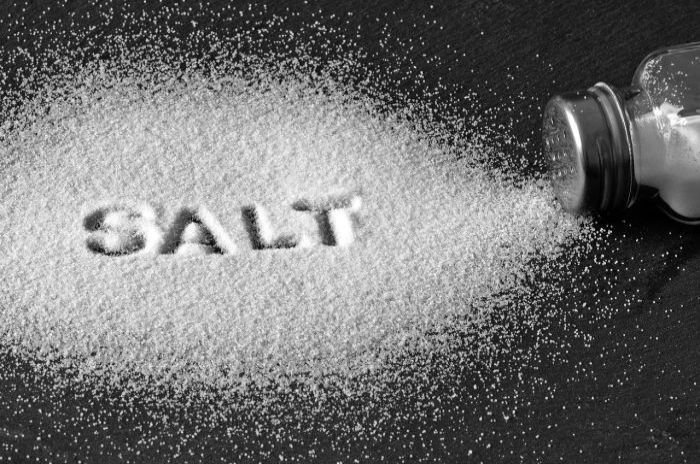
Acid-and-salt warning: this original method is not suitable for plated, lacquered, patinated, antique, valuable or unknown brass. The CCI’s brass corrosion guidance records that salt and vinegar can cause dezincification. Stop if the test spot turns pink or coppery, and do not leave the mixture to dry on the surface.
- Step 1: Create a paste. Mix equal parts vinegar and salt, then add flour to achieve a paste-like consistency. This paste is gentle yet effective for moderate tarnish.
- Step 2: Apply it. Apply the paste liberally over the tarnished brass and leave it for up to an hour, allowing the acidic vinegar to break down the tarnish.
- Step 3: Rinse and dry. Rinse off the paste with warm water and dry the brass thoroughly with a soft cloth to prevent water spots and further tarnishing.
Gentle cleaning with soap and water
- Step 1: Create a mild solution. Mix a few drops of mild dish soap with warm water for a gentle cleaning solution. That’s perfect for lightly tarnished or delicate brass items.
- Step 2: Apply it with a soft cloth. Dip a soft cloth into the soapy water and gently rub the brass in a circular motion, paying extra attention to heavily tarnished spots.
- Step 3: Rinse and dry. Rinse the brass with clean water and dry immediately with a clean, soft cloth to prevent new tarnish from forming.
Make this the first route for an ordinary washable item. Use a damp rather than dripping cloth around joints and fixed hardware, and never immerse a mixed-material, hollow, wired or fitted object.
Cleaning brass with ketchup
Acid warning: ketchup is still an acidic food product and can leave sugar, salt and pigment in seams. Exclude plate, lacquer, antiques and unknown finishes; patch-test confirmed plain brass and rinse every trace away promptly.
- Step 1: Apply ketchup. Coat the brass item with a thin layer of ketchup and let it sit for 5-10 minutes. For heavier tarnish, you may need to leave it on longer.
Note: You might think I’m daft, but hear me out. Ketchup has an acidic tomato base. Because of it, it can gently nudge that tarnish away.
- Step 2: Rinse and dry. Rinse off the ketchup with warm water and buff the brass with a soft cloth to reveal a bright, shiny surface.
Polishing tarnished brass with toothpaste
Abrasion warning: toothpaste formulations vary and their abrasives can scratch a soft alloy or wear through thin plating. Do not use this route on polished, plated, lacquered, valuable or finely detailed surfaces.
- Step 1: Apply non-gel toothpaste. Apply a small amount of toothpaste to a soft-bristled brush or cloth and gently scrub the brass in a circular motion.
Note: The mild abrasives in non-gel toothpastes can help remove tarnish without scratching the brass surface. This method can help you clean silver, as well.
- Step 2: Rinse and dry. Wash the brass item with warm water and dry it thoroughly to prevent water marks.
The lemon and salt method
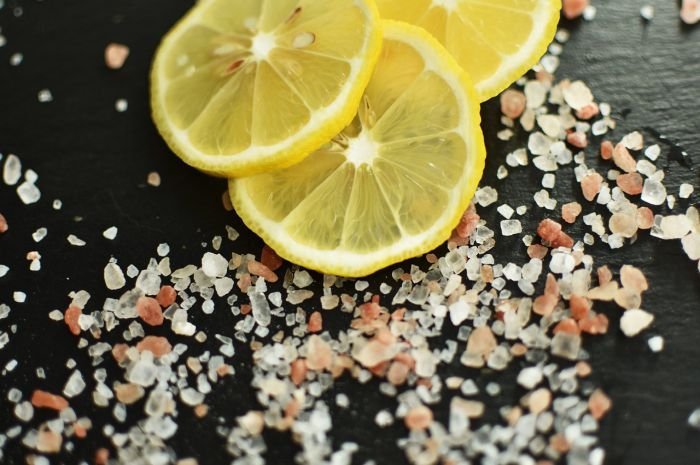
Acid-and-salt warning: lemon juice and salt carry the same material exclusions as vinegar and salt. Do not treat a stronger reaction as proof of a safer clean, and stop at any pink, coppery, streaky or rough change.
The acid in lemon juice combined with the abrasiveness of salt makes a potent mixture for removing stubborn tarnish.
- Step 1: Salt and lemon. Sprinkle salt over the cut side of a lemon half and rub it over the tarnished brass. Reapply salt as needed.
- Step 2: Rinse and dry. Rinse the brass with water and dry it immediately with a soft cloth to achieve a brilliant shine.
As you can see, most of our methods are relatively simple and involve items you already have at home. If that doesn’t help, you can always try a commercial brass cleaner.
Why acidic brass cleaners can leave a pink surface
Brass contains copper and zinc. Acids, alkaline products and chloride-rich mixtures can selectively remove zinc from some brass alloys. This is called dezincification, and a copper-rich pink or reddish area may become visible. Long contact and cleaner residue increase the concern, so more dwell time is not automatically better.
If a test area changes colour, stop. Do not cover the result with more polish. Rinse away compatible residues, dry the object and ask a metal specialist whether the surface change is superficial or part of a deeper corrosion problem.
You may also enjoy:
Maintaining Your Brass’s Shine
To keep tarnish at bay, regular wipes with a damp cloth and occasional polish can work wonders, especially in London’s moody weather. If you’re using a home cleaning service, it’s best to instruct the cleaners about your brass preferences.
Make sure to steer clear of harsh chemical cleaners that can strip the protective layer off the brass, making it more prone to tarnishing.
Finally, consider applying a thin coat of carnauba wax or a specialized brass lacquer to shield your items from the elements, especially in high-pollution areas
Coating limit: wax and lacquer change the maintenance route and may be difficult to remove from detailed or mixed-material objects. Do not coat an antique, valuable piece, musical instrument or unknown finish without appropriate specialist advice.
When to Call the Professionals
If DIY methods fail to remove deep-seated tarnish, it’s time to seek professional help. If your brass is still looking glum, it might be time to call in the cavalry – professional cleaners.
Not to sound like a broken record, but for heirlooms or expensive brass pieces, professional cleaners can offer safe and effective restoration without the risk of damage.
Finally, if your brass tarnishes frequently despite regular care, a professional assessment can help identify and mitigate underlying issues.
For routine household fittings, tell the cleaner exactly which finish and care method the owner or manufacturer has approved. Antique conservation, replating, structural repair and instrument servicing require an appropriately qualified specialist.
Book Regular Domestic Cleaning
Enter your postcode to view our rates and availability in your area.

FAQs
What is the best homemade cleaner for brass?
For an ordinary modern brass item that is confirmed safe to wet, start with a few drops of mild washing-up liquid in warm water and a soft cloth. Rinse away residue and dry immediately. Acidic or abrasive recipes are not suitable for brass plate, lacquer, deliberate patina, antiques or an unknown finish.
Does WD-40 clean brass?
WD-40 may loosen grime or leave a temporary sheen, but it is not a universal brass tarnish remover and it leaves a film. Follow the product and item instructions, test a hidden spot and do not use it as a substitute for specialist care on valuable, lacquered or mixed-material objects.
How can I make brass shine like gold at home?
First confirm that a polished appearance is intended. Clean ordinary compatible brass gently, then use only a polish approved for that item. Do not chase a brighter shine on plate, lacquer, antiques or intentional patina, because polishing removes material from the surface.
How do I clean badly tarnished brass?
Start with gentle cleaning to remove dust and grease. If the item is plain, modern, solid and unlacquered brass, patch-test the least aggressive compatible tarnish method, keep contact brief, rinse thoroughly and dry at once. Stop at pink, coppery, patchy or scratched changes and refer corrosion, antiques and valuable pieces to a specialist.
Safety note: the methods above cover routine household decisions, not metal identification, antique conservation, replating, instrument servicing or structural repair. Never mix a homemade recipe with bleach, ammonia or another cleaner. Follow product labels and the item’s care instructions, ventilate the area, protect skin and eyes as directed, keep products away from children and pets, and test an inconspicuous area. Stop if a coating lifts or the metal turns pink, coppery, rough, patchy or scratched.
Conclusion
Restoring the shine to tarnished brass is satisfying, and with these tips, you’re equipped to tackle even the most stubborn tarnish.
Remember, regular care keeps the tarnish scare away, but when things get tough, we’re never more than a phone call away.

Author: Atanas Dzhingarov
Hi, I’m Atanas - brand consultant and writer. I’m helping Samyx Cleaning create the best cleaning company blog on the Internet. Join us on our journey and learn how to live a cleaner, healthier, happier life in the process.
Discover more of our cleaning secrets: