
Deck Cleaning: How to Clean Wood and Composite Decking Safely

Last modified on: 26/08/2026
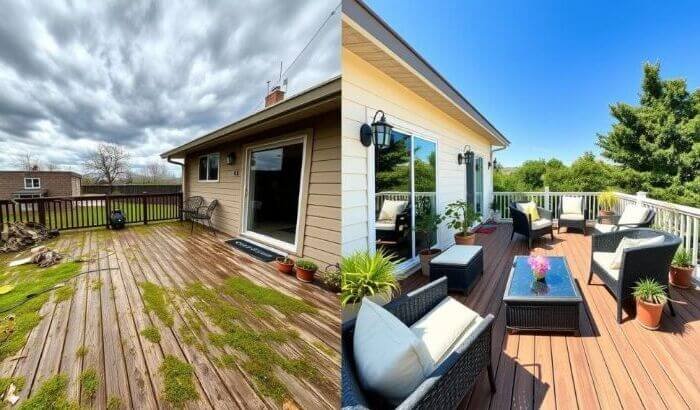
Deck cleaning starts by identifying the board material, its finish and any existing damage before choosing a cleaner, brush or water pressure.
Weathered timber, painted boards, capped composite and uncapped composite can react differently to the same treatment. A low-aggression process gives you room to increase the cleaning action only where the surface condition allows it. The sequence below separates ordinary dirt from algae, grease, failed coatings and structural problems that cleaning cannot repair.
Choose the method from the boards, finish and damage
- Confirm whether the decking is timber or composite and find the maker or coating instructions where possible.
- Inspect dry boards, fixings, edges, gaps and drainage. Stop where boards move, timber feels soft or a surface cap or coating is failing.
- Clear furniture, sweep loose debris and protect plants, walls, doors, electrics and runoff routes.
- Test the least aggressive compatible cleaner and brush on a small hidden area, then wash manageable sections without letting product dry.
- Rinse as instructed, leave the deck unused until it is dry and decide whether any remaining mark needs stain treatment, repair or refinishing.
Key Takeaways
- Identify timber, coating and composite construction before selecting a product.
- Inspect loose boards, raised fixings, soft timber and damaged caps before adding water.
- Start with sweeping, a compatible cleaner and controlled brushing.
- Use a pressure washer only when the exact board and finish instructions permit it.
- Let the surface dry before replacing furniture, judging stains or applying a new finish.
Table of Contents
Identify the decking material before cleaning
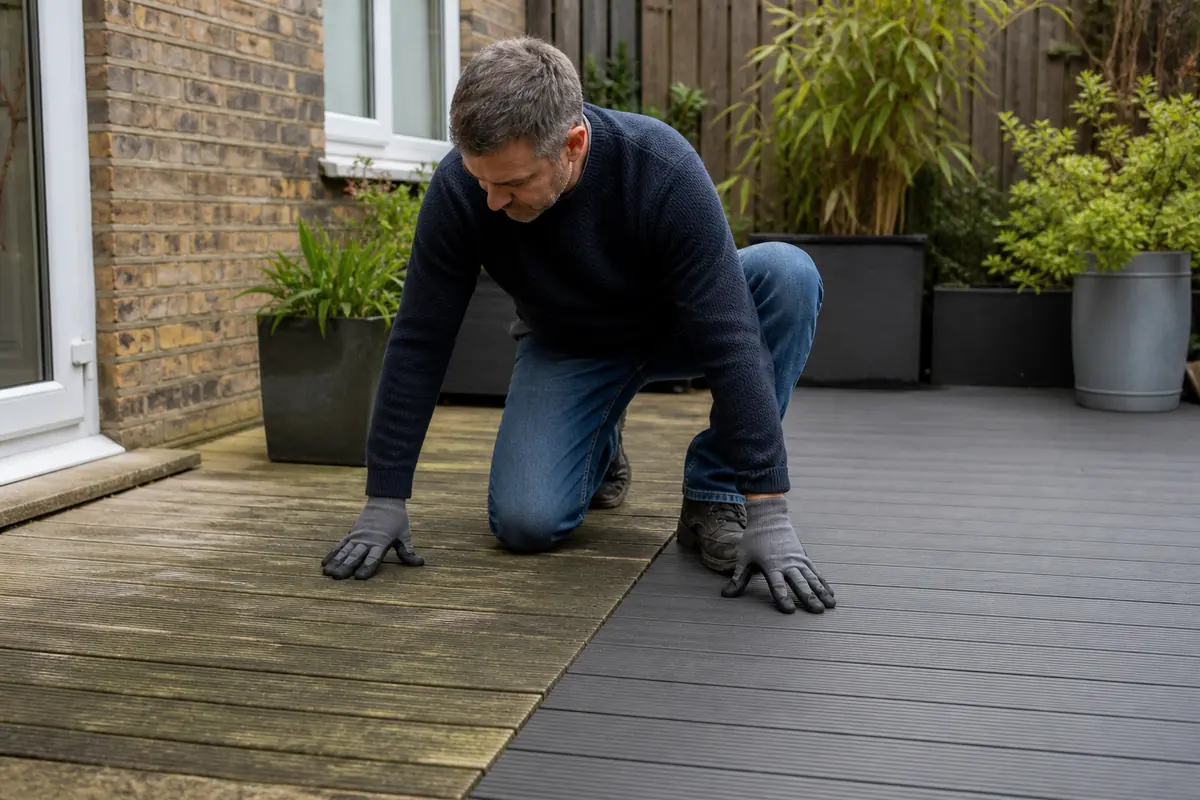
Timber has natural grain and can carry oil, stain, paint or a clear treatment. Composite boards combine manufactured materials and may have a protective cap over the core. Surface appearance alone is not always conclusive, especially after years of weathering or earlier coatings.
Check purchase records, installer information, spare board ends or maker markings. Ask the property owner when you are a tenant. Unknown boards receive the gentlest route until their construction is confirmed.
Look at the board ends and any worn edge. Natural growth rings, knots and uneven grain support a timber identification. Repeated moulded grain, uniform colour through several boards and a visible outer cap support a composite identification. These clues guide the search for records; they do not replace the maker’s specification.
Record the finish as a separate layer. Timber may be bare, oiled, stained, painted or previously stripped. Composite may carry factory texturing, a polymer cap or a later coating that the board maker never recommended. The finish determines what the brush and cleaner touch first.
| What you find | Starting route | Stop or escalate when |
|---|---|---|
| Unfinished or weathered timber | Soft-to-medium deck brush and a labelled timber-compatible cleaner | The wood is soft, split, badly splintered or moving underfoot |
| Oiled, stained or painted timber | Hidden-area test with a product compatible with the coating | Colour transfers, coating lifts or the surface becomes fuzzy |
| Capped composite | Maker-approved mild cleaner and soft nylon brush | The cap is scratched, lifting, burnt or worn through |
| Uncapped or unknown composite | Manufacturer instructions and a low-moisture hidden test | The board swells, changes shade or holds a persistent stain |
| Loose boards or raised fixings | Repair assessment before cleaning | Movement, sharp edges or unstable steps create a fall risk |
You may also enjoy:

Prepare the deck and control the work area
Choose a dry inspection period with enough suitable weather for washing and drying. Move furniture, rugs, barbecues and pots off the decking. Lift items instead of dragging them across timber or composite surfaces. The wider outdoor reset helps separate cleaning from decluttering and garden waste.
Sweep leaves, grit and soil from the surface and board gaps. Use a suitable non-metal tool for accessible gaps, taking care around hidden cables, membranes and fixings. Packed debris holds moisture and can block the route you need for rinsing.
Cover or move sensitive items and follow the cleaner label for plant protection. Plan where the dirty water will travel. Keep product away from ponds, surface water and neighbouring property, and use the runoff choices to reduce unnecessary chemical use.
Wear footwear with grip and keep children and pets away until the surface is clean, rinsed and dry. Check outdoor sockets, lighting, extension leads and equipment connections before water use. Do not continue when wet access to electrics cannot be controlled.
Photograph damaged boards and the dry starting condition when the property is rented or shared. Mark loose areas so nobody steps onto them during the clean. Put tools where hoses and brush handles will not cross a doorway or escape route.
Deck cleaning step by step
1. Inspect the dry surface
Walk the deck slowly before moving equipment onto it. Look for raised screw heads, loose boards, sharp splinters, cracked edges, soft patches and movement around steps or railings. Cleaning can reveal damage; it cannot restore structural strength. Arrange repair first when safe footing is uncertain.
2. Choose the cleaner from the surface
Read the decking, coating and cleaner instructions together. A labelled deck cleaner may suit compatible timber. Many composite makers direct owners to mild soap and a soft brush for ordinary soil. Neither route applies automatically to every board.
Do not mix products or turn vinegar, bicarbonate, chlorine bleach or washing-up liquid into a universal formula. Check dilution, personal protection, application, dwell and rinse directions on the exact product. Prepare only what you can use safely during the working period.
A cleaner needs to match both the soil and the surface. General dust, greasy food residue, algae and an old coating do not need the same chemistry. Select one compatible route, rinse as directed and assess the dry result before considering a second treatment. Layering different products can create residue and unsafe reactions.
3. Test a hidden section
Select a small inconspicuous area that represents the same board and finish. Apply the proposed method, rinse it and allow the test to dry. Check for colour loss, raised grain, whitening, haze, scratching, softened coating or a different sheen. A wet test can hide damage that becomes clear after drying.
4. Work in manageable sections
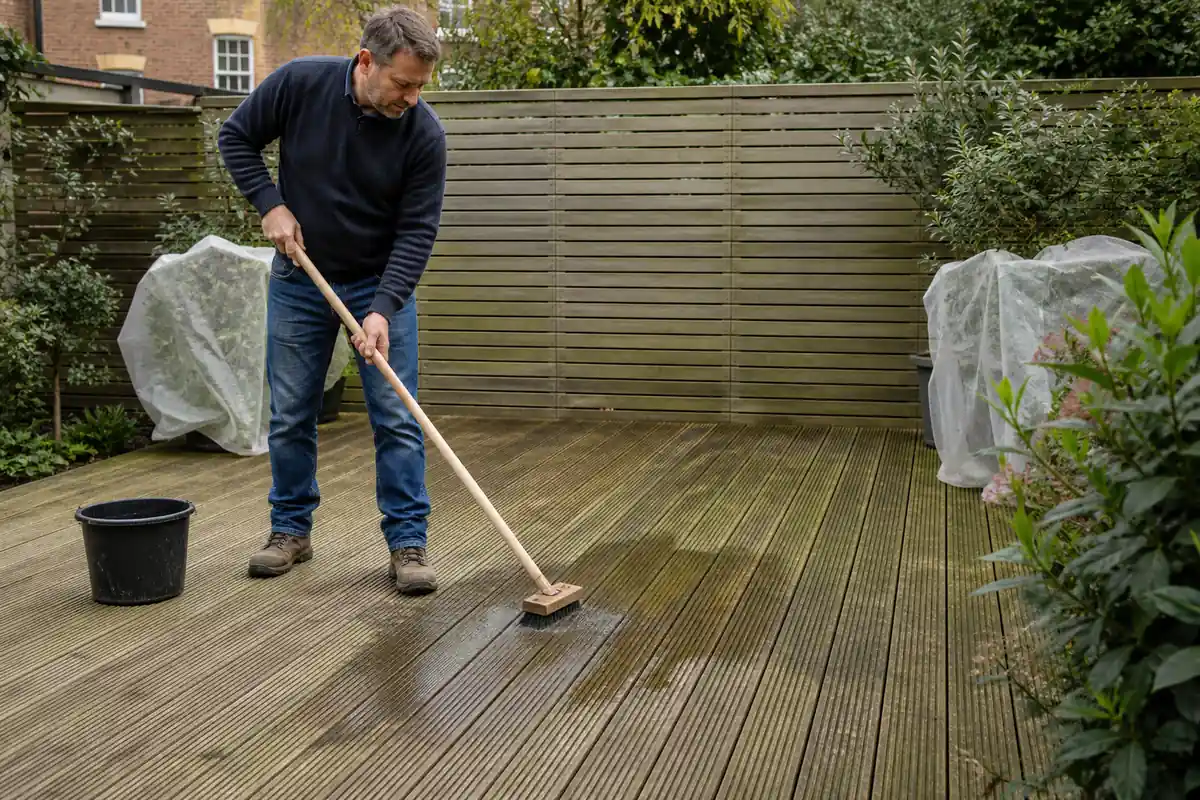
Follow any pre-wetting instruction, then apply the compatible solution evenly. Keep the working edge controlled so the cleaner does not dry on the boards. Avoid flooding door thresholds, wall junctions and the space below raised decking.
5. Brush with the board direction
Use a brush stiffness approved for the material. Work along the grain or moulded board direction with overlapping passes. Repeated controlled strokes are safer than attacking one mark with a wire brush or abrasive pad. Rinse the brush when it collects grit.
6. Rinse and inspect the runoff
Rinse as the product and decking instructions specify. Move dirty water towards the planned collection or drainage route without pushing it into the building, beneath doors or across a public path. Remove foam and suspended soil before they dry into a film.
7. Leave the deck to dry
Keep the area clear until the surface and gaps have dried sufficiently for safe use. Shade, temperature, airflow, board construction and water volume all change the drying period. Check the coating or treatment instructions before applying oil, stain, paint or another protective product.
Best way to clean a wood deck
Wooden decking needs two separate decisions: the condition of the timber and the condition of its finish. Grey weathering, green surface growth, peeling stain and soft rot are different problems. Washing may remove surface soil and growth, yet it will not rebuild decayed fibres or bond a failed coating.
Begin with sweeping and a hidden test using a timber-compatible product. Scrub along the grain with a suitable deck brush. Keep the cleaner wet for the labelled working time and rinse completely. Avoid aggressive cross-grain scrubbing, wire tools and concentrated chemicals that have not been approved for the timber and finish.
Previously coated boards need extra care. A cleaner or strong jet can strip weak stain unevenly and leave a patchy surface. Follow the coating maker’s finish guidance and plan cleaning, drying, preparation and recoating as one system when restoration is due.
Green growth collects fastest where boards stay shaded, leaves sit in gaps or air cannot circulate beneath furniture. Remove the loose material, use a compatible treatment and improve the maintenance conditions that allowed it to return. A dark patch close to a failed joint or soft board needs repair assessment because surface cleaning does not reveal how far moisture damage extends.
Old timber can absorb water unevenly and show temporary shade variation during drying. Wait for the full surface to dry before deciding that a stain remains. If one board stays unusually dark, feels soft or has a musty odour, restrict access and ask a timber specialist to inspect it.
Raised fibres after cleaning can make timber feel rough. Do not assume a harder second wash will correct them. Let the wood dry, assess splinters and surface erosion, then follow the appropriate refinishing route or ask a timber-care professional.
Best way to clean composite decking
Composite decking is a manufactured system, and brand instructions carry more weight than a generic recipe. Capped boards have an outer protective layer; uncapped products expose more of the composite material. Age, cap wear, warranty terms and earlier cleaning attempts change what the surface can tolerate.
For ordinary dirt, many makers specify warm water, mild soap and a soft nylon brush. Confirm that route for the exact product. Work with the moulded grain, rinse before soap dries and clear trapped leaf material from gaps using a non-damaging tool.
Grease, food, rust transfer, tannin from wet leaves and biological growth need separate product checks. Blot fresh spills promptly and use the maker-approved treatment for the stain type. The Trex maker guidance demonstrates why care instructions vary across deposits and product lines.
Clean spills across the complete affected board width when the manufacturer directs it. Spot treatment can leave a clean halo around the original mark. Rinse nearby boards carefully so loosened soil does not settle at the edge of the test area.
Composite gaps and hidden supports still need drainage. Clear loose leaf fragments without forcing a sharp tool against board edges or clips. Water pooling beneath a board may point to installation or drainage trouble that a surface wash cannot correct.
Do not sand, scrape or scour composite boards unless the manufacturer specifically allows the action. Damage to a cap or embossed finish may be permanent. A mark that remains after the approved cleaner may need installer or manufacturer advice, not a stronger household chemical.
Should you pressure wash decking?
A pressure washer is an option only when the board manufacturer, coating maker and surface condition allow it. There is no responsible universal pressure, nozzle or distance setting for all timber and composite decking. Weathered softwood, loose coatings, damaged composite caps, joints and board edges can be harmed before the dirt has gone.
Start with manual cleaning. If pressure washing is permitted, test a hidden area and use the equipment instructions, the least aggressive suitable setting and a controlled fan pattern. Keep the jet moving with the board direction. Never direct pressurised water at people, animals, electrics, windows, loose fixings or beneath cladding and thresholds.
Stop when fibres lift, coating strips, colour changes, water is driven into joints or the tool becomes difficult to control. A professional operator still needs the material information; professional equipment does not remove the compatibility limits.
Pressure washing also changes the runoff problem. The jet can move loosened coating, algae and cleaning solution farther than manual rinsing. Set a clear exclusion area, keep the spray away from neighbouring boundaries and stop if wind carries mist towards people, open doors or vehicles.
Diagnose algae, stains and damage
| Visible problem | Likely route | Do not treat it as |
|---|---|---|
| Green slippery film | Compatible biological-growth cleaner, brushing and controlled rinsing | A reason for maximum pressure |
| Black spotting | Identify mould, dirt, tannin or material discolouration before treatment | Proof that chlorine bleach is suitable |
| Grease or food spill | Blot fresh residue and use a maker-approved degreasing route | A general whole-deck acid wash |
| Rust-coloured or leaf marks | Check for metal transfer or tannin and follow the board-specific stain advice | Ordinary loose dirt |
| Peeling stain or paint | Plan coating preparation and refinishing after the deck dries | A stain that repeated washing will fix |
| Soft wood, deep splits or movement | Repair assessment and restricted access | A cosmetic cleaning problem |
Clean one test area and compare it only after drying. Dark colour can remain in sound timber after surface growth has gone. Composite boards may also retain a shade change after an incompatible product or heat damage. Repeating the same treatment without identifying the cause increases the risk of surface damage.
Drying, aftercare and maintenance
Leave furniture and pots off the deck until the surface is dry and safe. Returning a heavy planter too soon can trap moisture and create a new mark. Fit suitable feet or pads where the board maker permits them, and keep ventilation and drainage gaps open.
There is no single cleaning calendar for every deck. Tree cover, shade, drainage, foot traffic, cooking, nearby soil and the board finish all affect the rate of soiling. Sweep leaves before they break down, deal with spills promptly and schedule a full wash when surface film, poor grip or embedded soil appears.
Inspect timber coatings after the deck dries and follow their maintenance cycle. Composite boards normally do not receive timber oil or stain unless their maker specifies a compatible treatment. Keep a note of the product and method used so the next clean starts with known information.
Change the arrangement if the same areas repeatedly stay wet. Move pots often enough to inspect beneath them, clear leaves from edges and avoid covering ventilation gaps with outdoor rugs for long periods. Check feet and fixings on furniture for rust or sharp edges before returning them to the boards.
Tenants preparing a whole outdoor area can use the separate tenancy checklist for furniture, waste, balconies and evidence. The decking method still follows its own material and condition limits.
How Samyx Cleaning can help with outdoor surfaces
A mixed outdoor area may contain both decking and paved patio surfaces. Samyx’s patio cleaning service covers the paved patio route. Describe decking separately when you enquire so the team can confirm whether its material, condition and requested treatment are within scope.
Arrange specialist assessment where boards move, timber is soft, a coating needs stripping, composite caps are damaged, access is unsafe or runoff cannot be controlled. Cleaning should wait until the surface can be worked on without adding structural, material or environmental risk.
Safety note: Keep people and pets away from the wet deck, follow every product and equipment label, wear suitable footwear and protective equipment, and never mix cleaning products. Stop before water reaches unsafe electrics or an unstable part of the structure.
Ask About Patio Cleaning
Enter your postcode to view our rates and availability in your area.

Frequently asked questions
-
What is the best thing to clean a deck with?
Use the cleaner and brush approved for the board material and any existing coating. Compatible timber may need a labelled decking cleaner and deck brush. Many composite manufacturers specify mild soap and a soft nylon brush for ordinary dirt. Test a hidden area and follow the exact product instructions.
-
Should you pressure wash decking?
Only when the board manufacturer, coating maker and current condition allow it. Start with manual cleaning. If pressure washing is approved, use the equipment and surface instructions, test a hidden area and stop if timber fibres lift, coatings strip or composite caps change.
-
Can washing-up liquid clean composite decking?
Some composite manufacturers allow a small amount of mild washing-up liquid in warm water for ordinary soil. Check the exact brand instructions first, use a soft approved brush and rinse before the solution dries. A stain, damaged cap or unknown product needs a material-specific route.
Author: Svetlana Georgieva (Clara)
Hi, I’m Svetlana Georgieva, but you can call me Clara. As the co-founder and heart behind Samyx Cleaning, I’m devoted to sharing the art of a clean space. Let’s journey into a cleaner, more joyful life together with tips from London's cleaning experts.

Discover more of our cleaning secrets: