
How to Clean Your Burnt Iron with (Mostly) Natural Products

Last modified on: 03/09/2026
Publish: 30th Oct 2023
Views:
Category: DIY
Tags:
Baking soda, Cleaning tips, Iron cleaning, White vinegar

How to clean burnt iron soleplate residue safely depends on what is stuck to the plate and which coating your model uses.
Cleaning your burnt iron is nothing short of a battle. Over time, your trusty appliance may, nay – will develop unwanted quirks. We’re talking scorch marks, an unsavory aroma, or perhaps even some obstinate residue from your now ruined garments.
Buying a brand-new iron will definitely cost you less than replacing your wardrobe every other week. But before you throw your burnt iron away, maybe we can try and save it.
Fear not, for I shall unveil a formidable arsenal of iron-cleaning strategies to restore your appliance to its former glory. And, if it doesn’t work, you can always go with plan B.
Key takeaways
- The model manual and soleplate coating decide which treatment is suitable.
- A raised deposit may be removable, but a scratch, chip or exposed base material is damage rather than dirt.
- The lowest-risk first step is usually a cool, unplugged iron and a soft cloth lightly dampened with water.
- Hot medicine, acetone, salt and abrasive pastes are not universal soleplate cleaners and can introduce new hazards.
- Do not pour vinegar, descaler or fragrance into the reservoir unless the exact model instructions say to use it there.
Table of Contents
Why should you clean your iron?
Before we plunge into the iron cleaning itself, it’s essential to understand the significance of maintaining your iron. Neglected irons can inflict damage to your clothes. Those include stubborn scorch marks, snagged garments, and even fabric-staining burn marks.
As if that weren’t enough, a poorly maintained iron might even lead to more catastrophic consequences like fires. Thus, the need to embark on your iron-cleaning quest becomes abundantly clear.
Note: Attempt any of the methods below at your own discretion! Some techniques may seem strange, but most work like a charm.
Current safety boundary: The original household methods are preserved below as written, but they are not a universal recommendation. Check the exact model manual first. Do not use a hot, abrasive or solvent method unless the manufacturer explicitly permits it for that soleplate.
Cleaning the soleplate
Our journey begins with the noble endeavour of cleaning the soleplate. Here, you will find a diverse array of weapons at your disposal, and it’s crucial to select the right one for the job.
Identify residue or soleplate damage
Look at the mark when the iron is unplugged and cold. Appearance provides a clue, not proof. The coating and the exact model instructions still control the next step.
| What you see | Likely condition | First safe response | Stop when |
|---|---|---|---|
| Raised, glossy or coloured material | Melted synthetic fabric or transfer from an iron-on product | Check the manual for the approved residue-removal method. Begin only after the plate has cooled. | The coating changes colour, lifts or reveals a scratch beneath the deposit. |
| Brown or black film that sits on the surface | Starch, finishing product or overheated residue | Try a soft damp cloth on the cool plate, then use only a model-approved cleaner if needed. | The mark does not soften or the cloth catches on a damaged area. |
| Pale, chalky marks around steam holes | Mineral residue from water | Use the model’s anti-calc or descaling route. Keep general cleaning paste out of the holes. | Water leaks into the case or the manual excludes home descaling. |
| Scratch, chip, rough edge or exposed base material | Permanent coating or plate damage | Stop cleaning and ask the manufacturer or an authorised repair service whether the iron is usable. | Immediately. Abrasion will not restore a coating. |
| Residue returns on a test cloth | Material remains in vents, the plate is damaged or an internal fault is present | Stop using the iron and follow model-specific support. | There is smoke, sparking, leaking, a damaged cable or a persistent burning smell. |
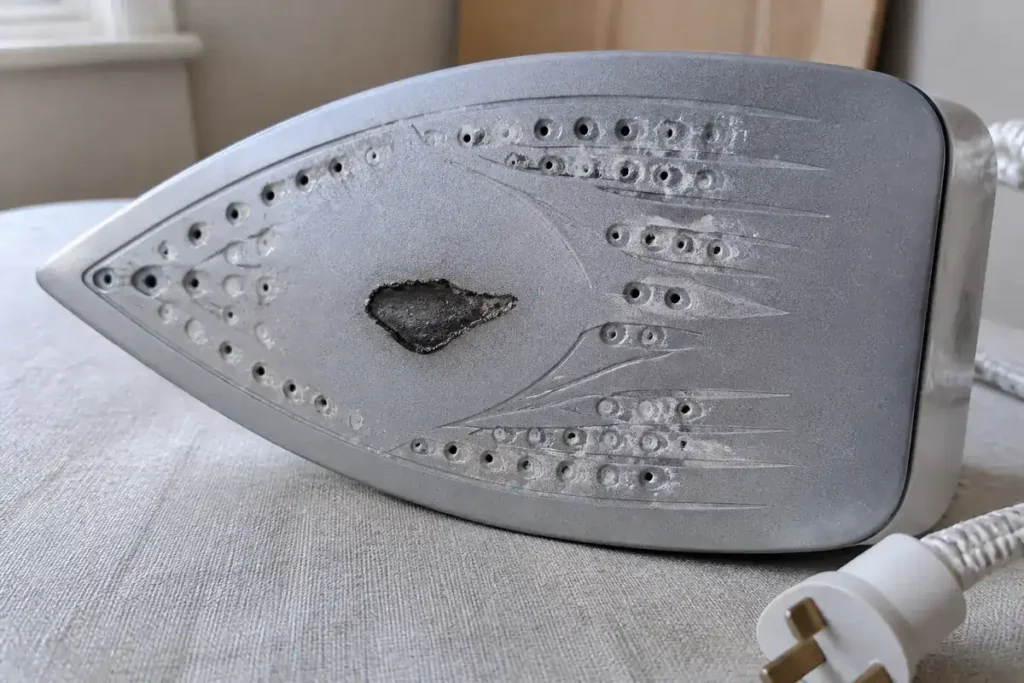
How to clean burnt iron soleplate residue safely
- Disconnect and cool it. Unplug the iron. Let the plate cool fully unless its own instructions specify a controlled warm-cleaning step.
- Read the model instructions. Confirm the soleplate material, approved cleaners, water type, anti-calc procedure and any excluded household products.
- Remove loose material. Use a dry soft cloth. Never use a knife, metal scraper, steel wool or a hard brush.
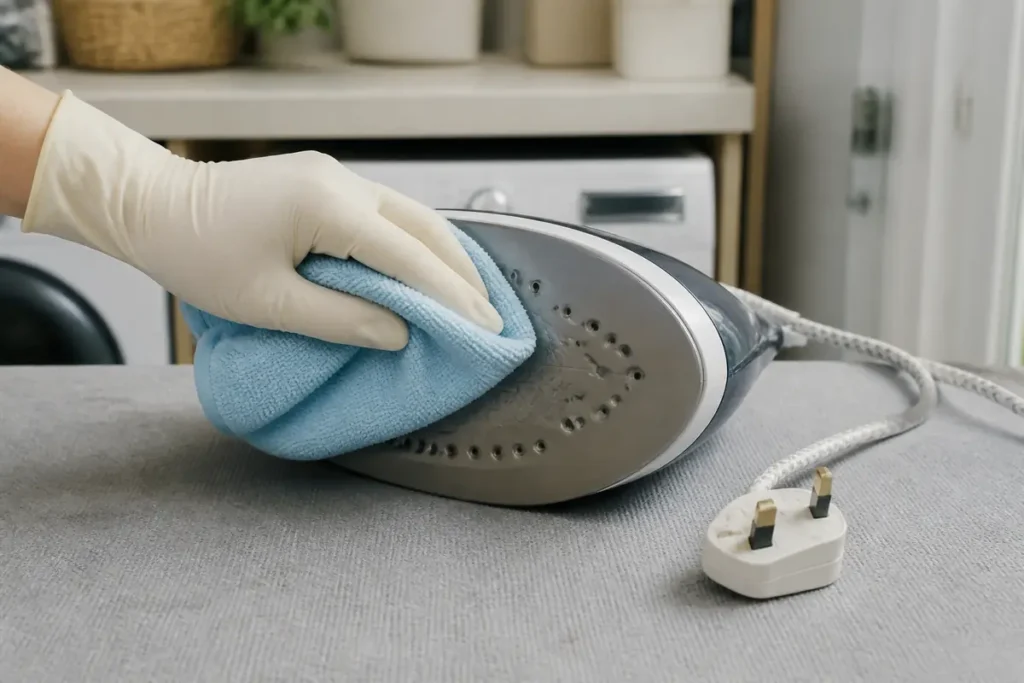
- Try the lowest-risk wipe. Use a clean soft cloth lightly dampened with water. Keep liquid out of the body, controls and cable entry.
- Escalate only within the manual. Apply the named cleaner or method for that model. Work around steam holes unless the instructions describe how to clean them.
- Dry, inspect and test. Remove every trace of cleaner, let the iron dry, inspect the plate and cable, then test on an old white cotton cloth at the lowest suitable setting.
You may also enjoy:

Original household methods and their current limits
The following methods remain in Atanas’s original wording. They should not be treated as a sequence or as approval for every iron. Use the model manual and the current compatibility notes to decide whether to stop before trying one.
Iron over salt and baking paper:
This method may seem a little odd and a little dangerous. That’s because there is risk involved. Then again, you’re handling a hot object, so there will always be a risk. Still, if you choose to attempt this method, be extra careful!
- Begin by heating your iron, sans steam.
- On the ironing board, lay a piece of baking paper, then scatter a modest layer of salt on it. Normal paper would also work (the iron isn’t hot enough to set it ablaze), but we want to minimise the risk.
- With your iron at the ready, execute swift, circular motions over the salt for a minute. You may need to resupply the salt a couple of times.
- When you’re done and the dust settles, unplug your iron, let it cool, and remove any remnants with a damp microfiber cloth.
Note: Don’t use this method if you have a teflon soleplate. It will get scratched.
Current compatibility note: Salt is abrasive. It can mark ceramic, non-stick and other coated plates even when the coating is not described as Teflon. Do not substitute ordinary paper in a heated setup. Skip this method unless the exact manual permits it.
Scrub with baking soda:
If you’re a regular reader, I know what you’re thinking. “Baking soda? Again?” Yes! You know baking soda can be used for a myriad of cleaning purposes. So why not this? Here’s how to do it:
- Employ the baking soda by creating a robust paste with two parts baking soda and one part water.
- Apply this paste to the soleplate, but exercise caution to avoid obstructing the steam vents.
- Clean up your iron using a toothbrush, then triumphantly wipe away the residue with a damp microfiber cloth.
Note: Don’t use this method if you have a teflon soleplate. It will get scratched.
Current compatibility note: Bicarbonate paste is abrasive and can lodge in steam holes. Use it only where the model instructions allow it, and do not push it into vents or combine it with vinegar.
Wipe with toothpaste:
“Now you’re just pulling my leg”, you’re probably thinking. But I assure you, I’m as serious as a tax inspector. Here’s how to clean your iron with toothpaste:
- You will find a surprising ally in the form of plain white toothpaste (gel toothpaste won’t work in this scenario).
- Apply a modest amount to the affected areas, and with a damp microfiber cloth, to eliminate the burn marks. You want to avoid the steam vents, if possible.
- In case any toothpaste gets into your steam vents despite your best efforts, do not despair. Fill your iron’s reservoir with distilled water, then place the iron upright on an aged towel. Engage the steam mode for a few minutes while it rests on the ironing board, and hold the steam button for 20-30 seconds. Repeat this action 5-6 times until the steam flows freely.
Current compatibility note: Toothpaste varies in abrasiveness and additives. It is not a universal soleplate cleaner. If paste enters a steam hole, stop and follow the model’s cleaning instructions instead of steaming the residue through the iron.
Rub your iron with Paracetamol:
Paracetamol is another surprising burnt iron cleaner. This one will require quite a bit of dexterity, though. Attempt with extra caution!
- Elevate your iron to its highest setting and grasp a paracetamol tablet with a trusty pair of tweezers.
- Start rubbing the tablet across the soleplate. But heed caution to avoid direct contact with the searing surface.
- You’ll notice the tablet gradually transforming into a gel. The process will dissolve the black residue it encounters. Repeat as necessary, and finish the process by running the hot iron over a clean, damp towel.
Current safety note: We do not recommend the hot-tablet method. It brings hands and tweezers close to a very hot plate and can create melted medicine residue and fumes. Use the model-approved route instead.
Clean out with cotton swabs:
When the steam holes get clogged with grime, you can use a cotton swab dipped in white vinegar. Its acidic nature ensures the grime and mineral deposits are dealt with.
Current compatibility note: Vinegar may be allowed on some soleplates and excluded on others. Clean the holes only as the exact model instructions direct, and keep liquid from running into the case.
Rub with dryer sheets:
- In the absence of traditional tools, unveil the dryer sheet as a capable substitute.
- Set your iron to its lowest setting, then embark on the journey to cleanse the plate by placing the dryer sheet on the board and ironing over it. Replace the sheet a few times until you get the desired effect.
Current compatibility note: A dryer sheet can leave fragrance or conditioning residue on the plate. Do not use it unless the manufacturer allows the method, and remove every trace before testing the iron on fabric.
Wipe the surface with nail polish remover:
- If all else fails, you can try using nail polish remover as a last resort.
- Activate your iron, grant it time to heat up, and then, with a cotton ball dipped in nail polish remover, begin the process of wiping it. Hold the cotton with a pair of tweezers – you don’t want your fingers anywhere near a hot iron! Now marvel as the black disappears before your eyes.
Current safety note: Do not put nail-polish remover or acetone on a warm or hot iron. Vapour can ignite, and the solvent may damage coatings, plastics and seals. This is not part of the current method.
Cleaning the water reservoir
While the soleplate is crucial in our campaign, we mustn’t overlook the water reservoir. It’s a potential breeding ground for mould and unpleasant odours.
Model-manual boundary: Reservoir and anti-calc systems differ. Empty, rinse, descale or remove a filter only in the way stated for the exact model. General soleplate advice does not authorise putting vinegar or another cleaner into the tank.
Drain and clean:
- Begin by draining any remaining water from the reservoir.
- Next, concoct a solution of equal parts water and white vinegar.
- Elevate your iron, select a high heat with steam, and let it work until the solution has nearly evaporated.
- Following this, permit your iron to cool, then drain the remaining liquid.
- To conclude, fill the tank with distilled water, elevate the iron, and select the same high-heat steam setting. Allow it to operate for 5-10 minutes, ensuring a thorough rinsing.
Current compatibility note: Do not run vinegar through the tank unless the model manual gives that exact procedure. Some irons use a self-clean or removable anti-calc system and can be damaged by an unapproved descaler.
Reservoir filter maintenance:
- For iron models equipped with reservoir filters, put them into a vinegar-water bath.
- Scrub the filters with a dish brush, rinse them thoroughly, and permit them to dry before reinstating them.
Current compatibility note: A removable valve, filter or anti-calc collector may have its own material and cleaning route. Remove or soak it only when the manual says it is user-serviceable and names the solution.
How to preserve your iron
To avoid future endeavours and maintain your iron’s pristine state, consider these tips:
Know your fabrics:
Different fabrics have varying ironing requirements, and some may not withstand high heat or steam. Always heed the instructions on clothing tags. When uncertain, start by using the lowest heat setting and test an interior seam.
Use a barrier:
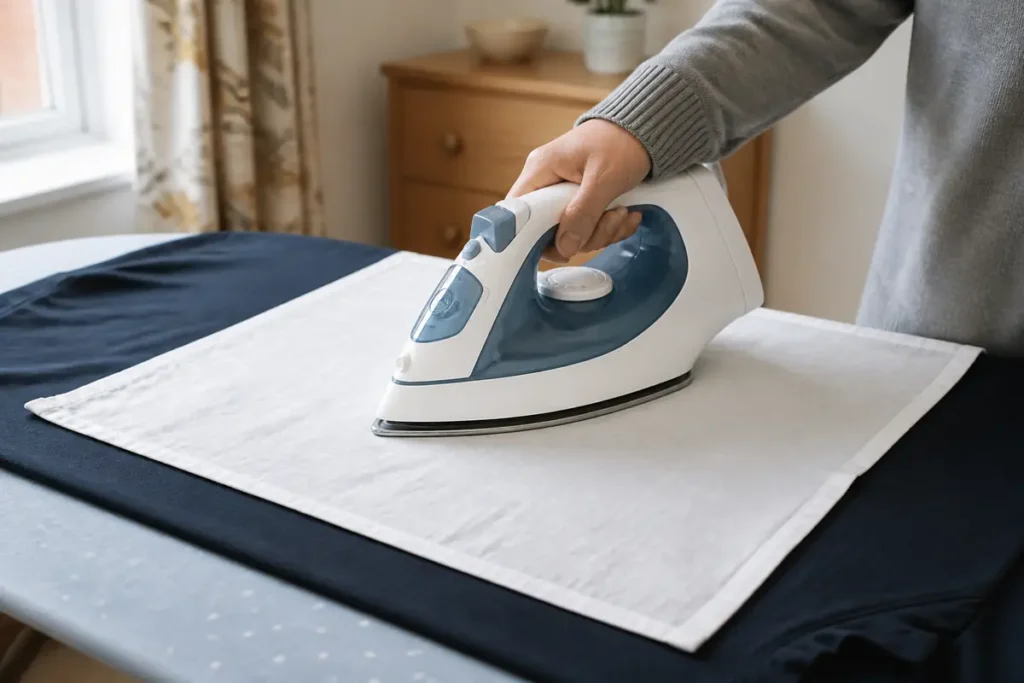
Safeguard your iron and your garments by introducing a clean press cloth or a thin cotton towel during ironing. These loyal defenders serve as an effective bulwark against synthetic fabric-induced residue.
Embrace distilled water:
Most areas in London have hard water. Hard water leads to limescale deposits which can ruin your appliances. In these cases, distilled water emerges as your champion. It sustains your iron’s steam prowess and keeps the insidious mineral buildup on the soleplate at bay.
Current water note: Follow the model’s water specification. Some irons are designed for tap water, some permit a stated mixture and some give another route for hard-water areas. Do not substitute distilled water automatically.
After-ironing cleanup:
After each ironing, diligently wipe your iron’s cooled soleplate with a damp microfiber cloth. You should especially do this if you’ve employed starch.
When cleaning is not enough
Stop using the iron if the soleplate coating is chipped, cracked, lifting or exposing another material. Cleaning cannot rebuild that surface. The same stop rule applies to a damaged cable or plug, water entering the case, smoke, sparks, persistent burning or electrical odour, unexplained overheating and residue that returns on the test cloth.
Use the manufacturer or an authorised repair route to decide whether the model can be serviced. Do not dismantle an iron for a cleaning problem, and do not keep testing a plate that continues to mark fabric.
Frequently asked questions
-
How do I get black burnt stuff off the bottom of an iron?
Unplug the iron, let it cool and check whether the black material sits above the plate or the coating itself is damaged. Follow the exact model instructions and begin with a soft cloth lightly dampened with water. Use only a cleaner permitted for that soleplate, keep residue out of the steam holes and test the dry iron on an old white cotton cloth before using it on clothes.
-
Can toothpaste clean a burnt iron?
Toothpaste can contain abrasives and additives that may mark a coated soleplate or block steam holes. It is not a universal iron cleaner. Use it only if the manufacturer permits that method for the exact model; otherwise choose the approved soleplate-cleaning route.
-
Will WD-40 clean an iron?
WD-40 is not a general soleplate-cleaning recommendation. Oil and solvent residue may transfer to clothing, affect coatings or create fumes when the iron heats. Use the model-approved cleaner and contact the manufacturer if residue remains.
-
How do I clean a very dirty iron soleplate?
Classify the deposit before increasing the cleaning strength. Melted fabric, starch film, mineral residue and damaged coating need different responses. Work from the lowest-risk manual-approved method, remove all cleaner, dry the iron and test it on scrap cotton. Stop for scratches, chips, persistent residue, smoke, sparking or a damaged cable.
Important: Follow the iron manual and manufacturer care instructions over general advice. Unplug the appliance and let it cool before cleaning unless the manual gives a specific controlled procedure. Keep water and cleaner out of the electrical case, cable entry and controls. Never mix cleaning products or use flammable solvent on a warm or hot plate. Avoid knives, metal scrapers, steel wool and unapproved abrasives. Stop if the coating discolours, dulls, scratches, chips or lifts, or if the iron leaks, smokes, sparks, smells persistently burnt or has a damaged cable or plug. Use manufacturer or authorised repair advice for an unknown, damaged or valuable appliance.
Conclusion
Cleaning your burnt iron is no walk in the park, but it doesn’t have to be the bane of your existence. Of course, replacing your iron is always the easiest way, but by learning how to clean and take care of it, you can save yourself some money on top of knowing you’re not contributing to rampant consumerism.
And, as always, if you need us, we’re never more than a phone call away.

Author: Atanas Dzhingarov
Hi, I’m Atanas - brand consultant and writer. I’m helping Samyx Cleaning create the best cleaning company blog on the Internet. Join us on our journey and learn how to live a cleaner, healthier, happier life in the process.
Discover more of our cleaning secrets: